
Skill level: intermediate | Material cost ~$40 | Time: 8-10 hours
**you can order one via the shop tab with custom measurements and some optional tweaks.
When we decided to through a princess party for Ravens 3rd bday, I spent a few nights showing her pictures and asking which princess she wanted to be. I couldn't be happier with her pick of Snow White, my favorite Disney princess and her dad's too! Here is an overview of custom making one like this, takes about 8-10 hours (making patterns, cutting and sewing), I did it over three days, with lots of fittings in between bc it was just so adorable on her.

Materials. Her pick of the cotton lace floral yellow is my favorite part of this creation 💛
1.5 yds yellow fabric for skirt
2 Yds. Lining
1 roll lace trim
1 yd. Blue satin for bodice
1/4 yd. Red for sleeve inserts
1/2 yd. Yellow ribbon trim
12" regular zipper
1/4 yd. Stiff twill and lace overlay for collar
boning, elastic and snaps for neckline
red flower appliqués and heat transfer shimmer optional

Updated a basic bodice to have v-hemline, square neckline and fit her measurements.

Updated a basic sleeve to have 4 sections and retraced patterns w/ added Seam allowance.

Cut 2 of sleeve patterns and also a 2" strip of red fabric. Pieced in red piece as putting the sleeve together.

Closed the sleeve cap red pleated in a box pleat shape.

Gathered sleeve cap for fullness and shape.

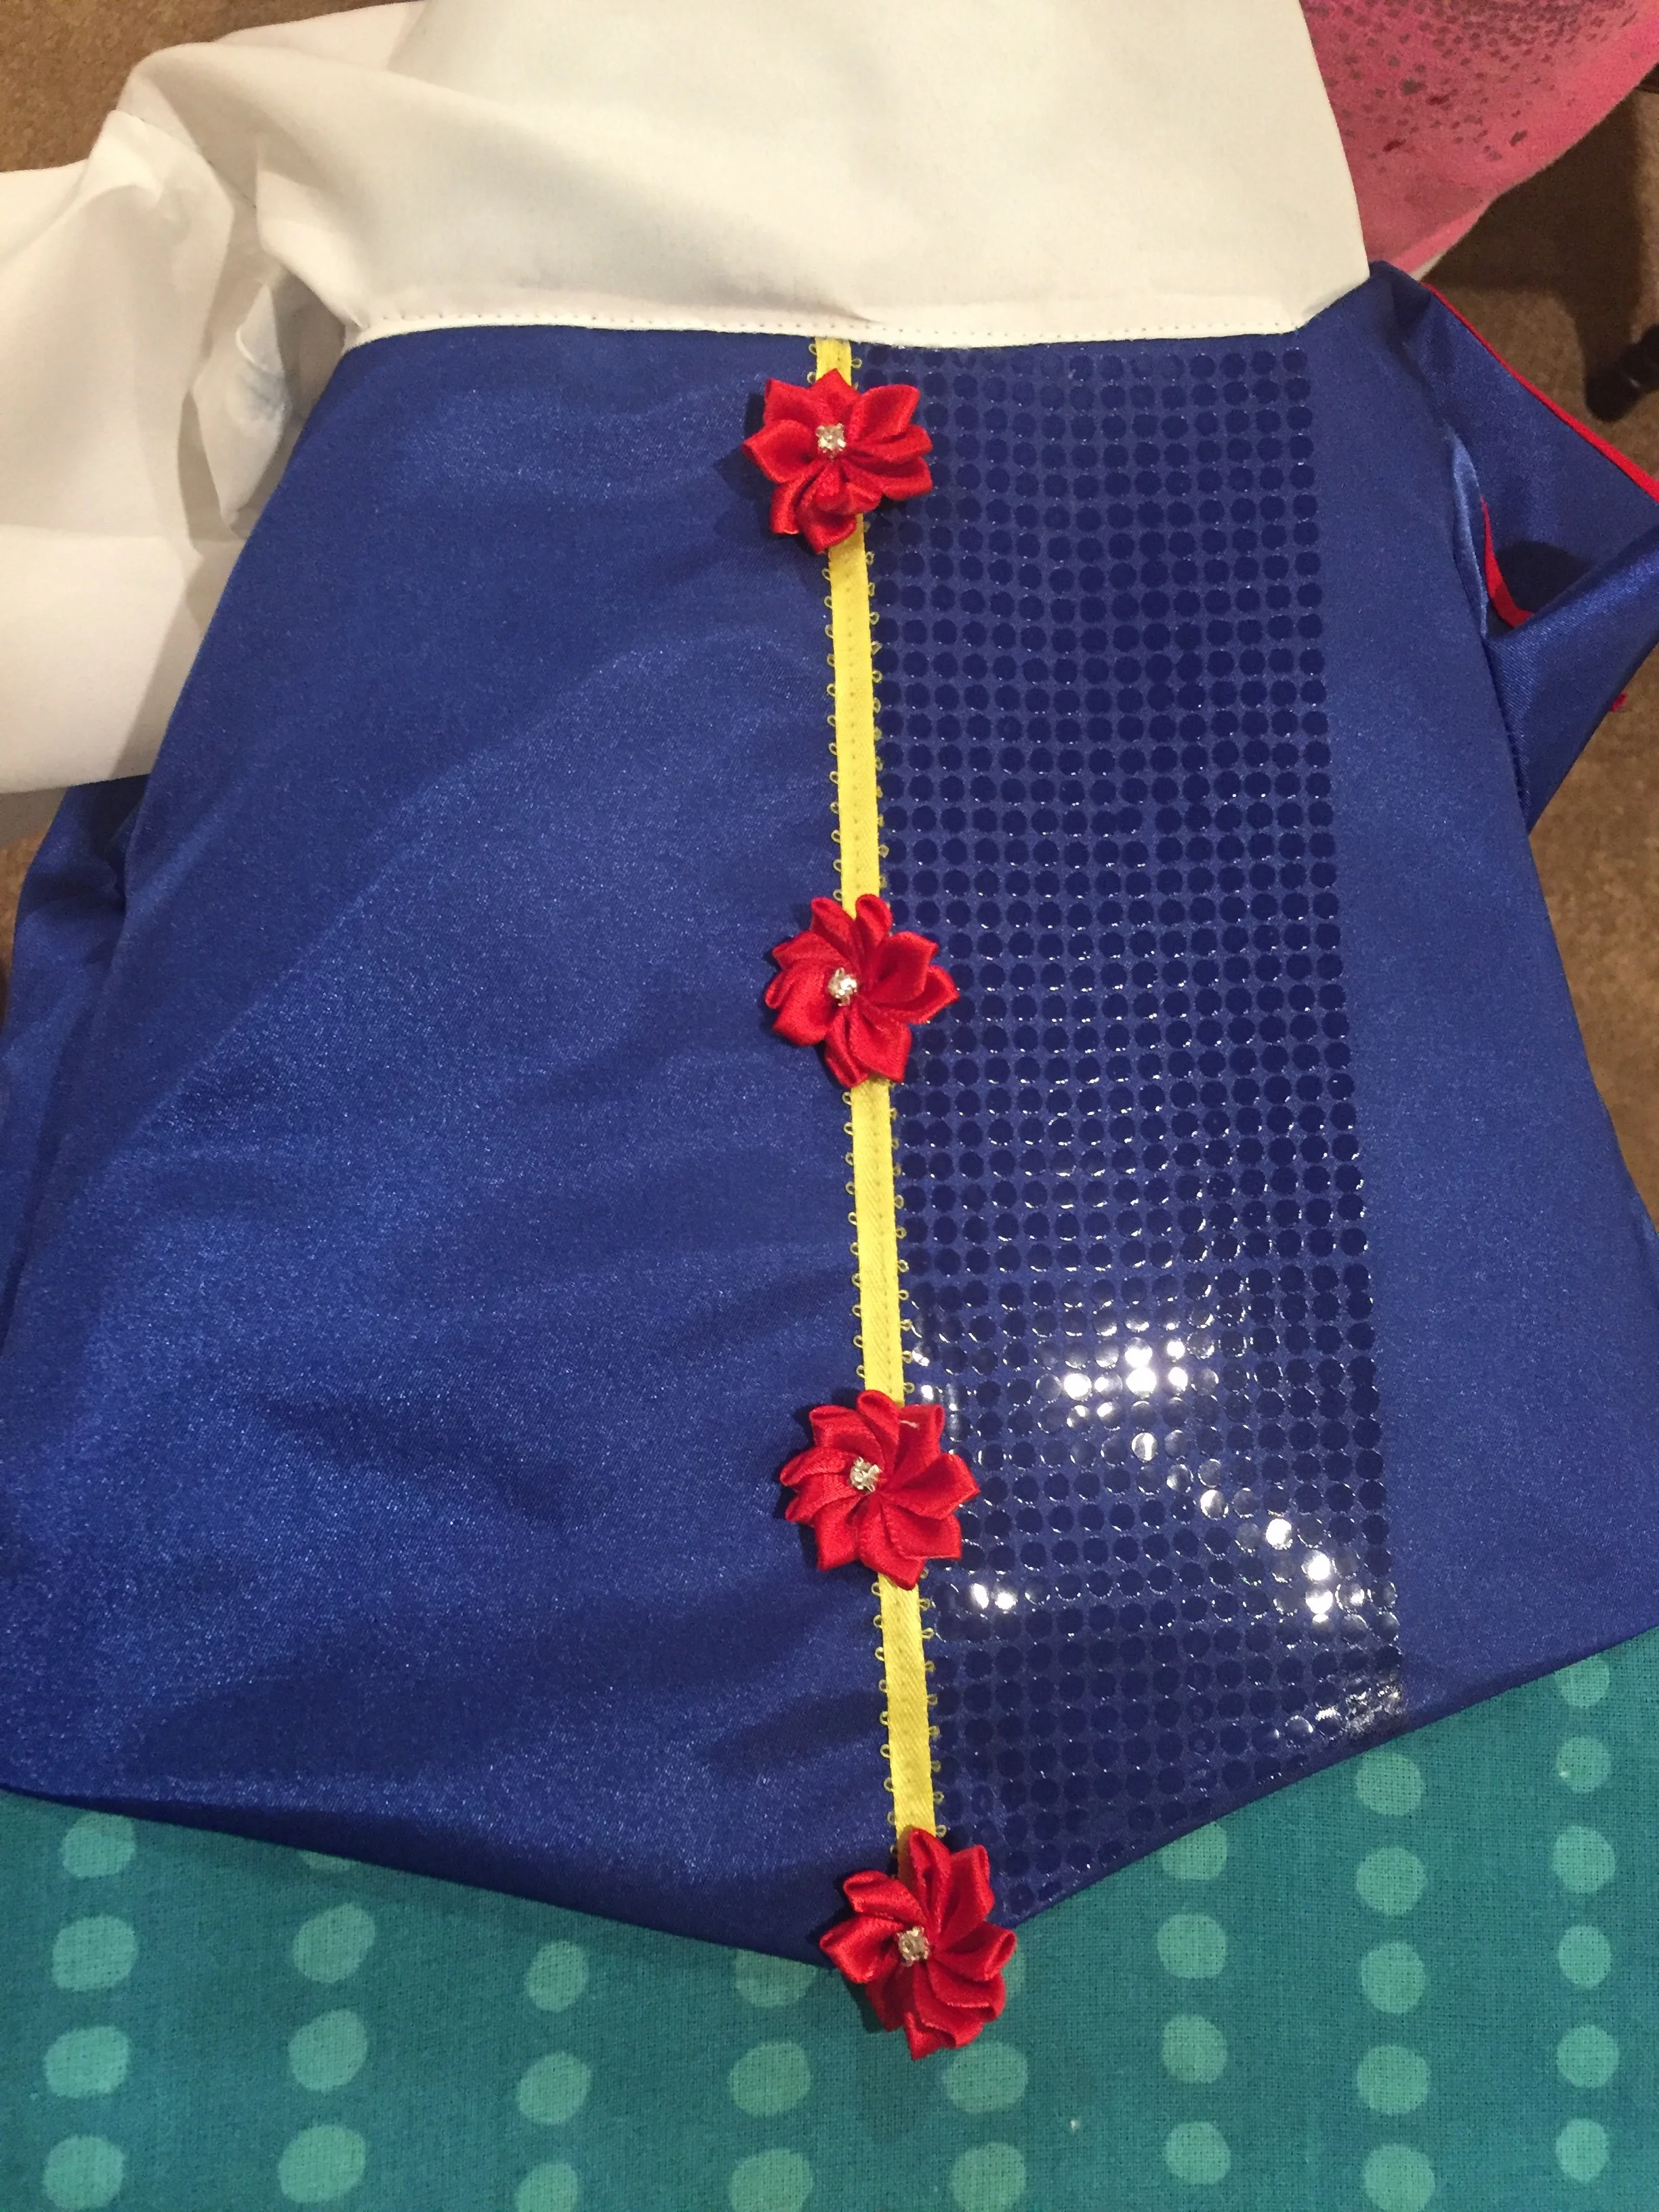
Once bodice is cut and sewn at shoulders, attached sleeves to bodice and top stitched yellow trim at CF. I also cut a facing for the hemline (front only) so the V would be nice and crisp.

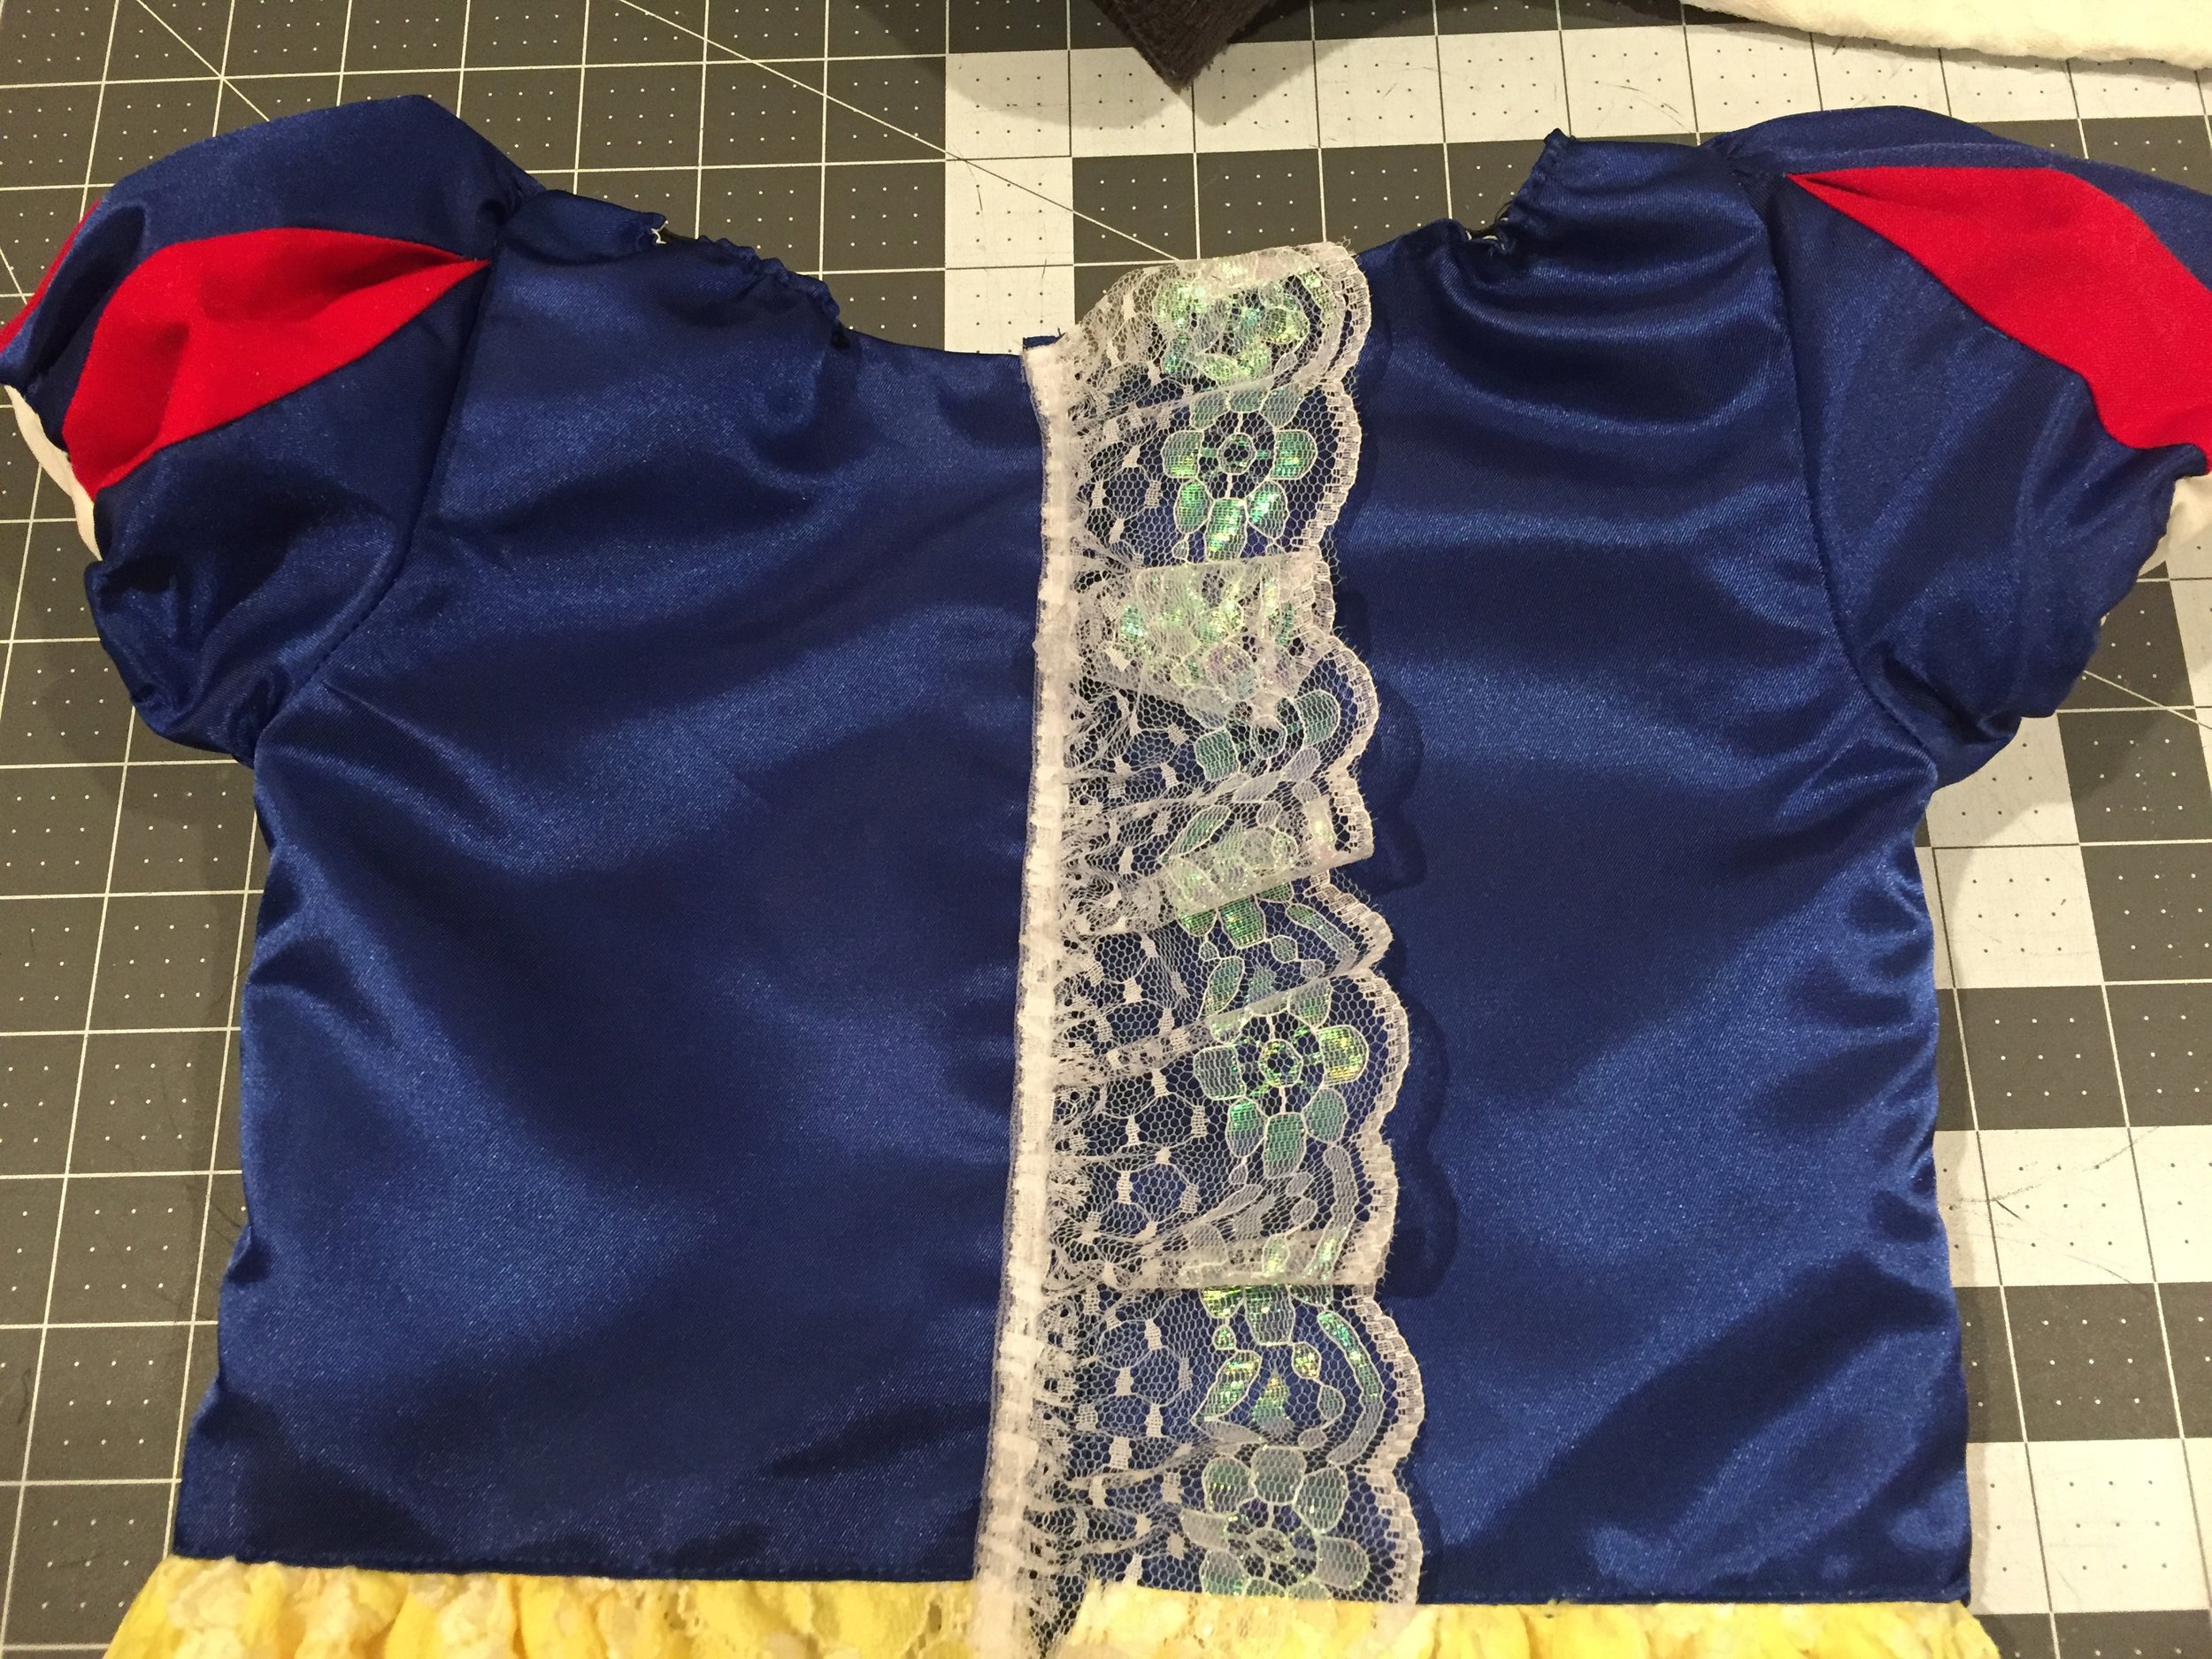
Cut and sewed the lining using the original sleeve pattern, left CB seam open.

Hand stitched flowers (I let her pick between sleeve and CF). I've noticed having a say in details makes kids more emotionally attached to the garment, giving it value.

Cut collar using measurements from neckline. Using stuff twill as base and a lace embroidered fabric she picked as overlay. Sewn all around only leaving neckline open.

Added a piece of boning to the inside so the collar would curve in around her neck.

Natural shape of the boning in collar.

Attached lining to self around neckline and finished with a holding stich, flipping seam allowance towards lining. This ensures the lining doesn't peak out when flipped inside.
This is when she tried it on and was kinda "eh", so her sister suggested glitter! Which reminded me of leftover iron on shimmer I had from when I was an assistant designer at St. John Knits http://www.stjohnknits.com/ a decade ago. (This is why I have so much stuff)!
💕 and I have to say this really made the front pop!
i don't have pics. Of the hardest part 😲 attaching the sleeve lining to the self bc I had to give my phone to the kids to watch a show so I could think clearly, which is exactly what it takes in order to sew that part right.

Moving onto the skirt, I used the whole width of the fabric and cut lining to match self. Attached them at the hemline, top stitching the ruffle trim, sewing CB (leaving about 3" for zipper at WB) and then gathered them together at the waistline.

Tip: to create a ruffle peak effect, cut the lining shorter than self so the top layer folds over the bottom.


Then I attached the bodice lining to skirt, creating a very clean inside. I pressed back bodice SA up and top-stitched it to the skirt, flipping it around to sew the v-facing to the front part of the skirt (this part is confusing).

One more fitting before the zipper to check measurements.

Attached the zipper and also added some elastic at neckline to keep it nice and snug on her shoulders.
I didn't 💙 the zipper tape showing and had some leftover trim, so I stitched this on top to add some fun in the back and hide the zipper.

Finishing touches, putting snaps on the collar and on the back neckline. A way around this is not doing a zipper (need knit fabrics) or doing a side zipper. However, I prefer removable accessories bc kids tend to be moody about them anyway.
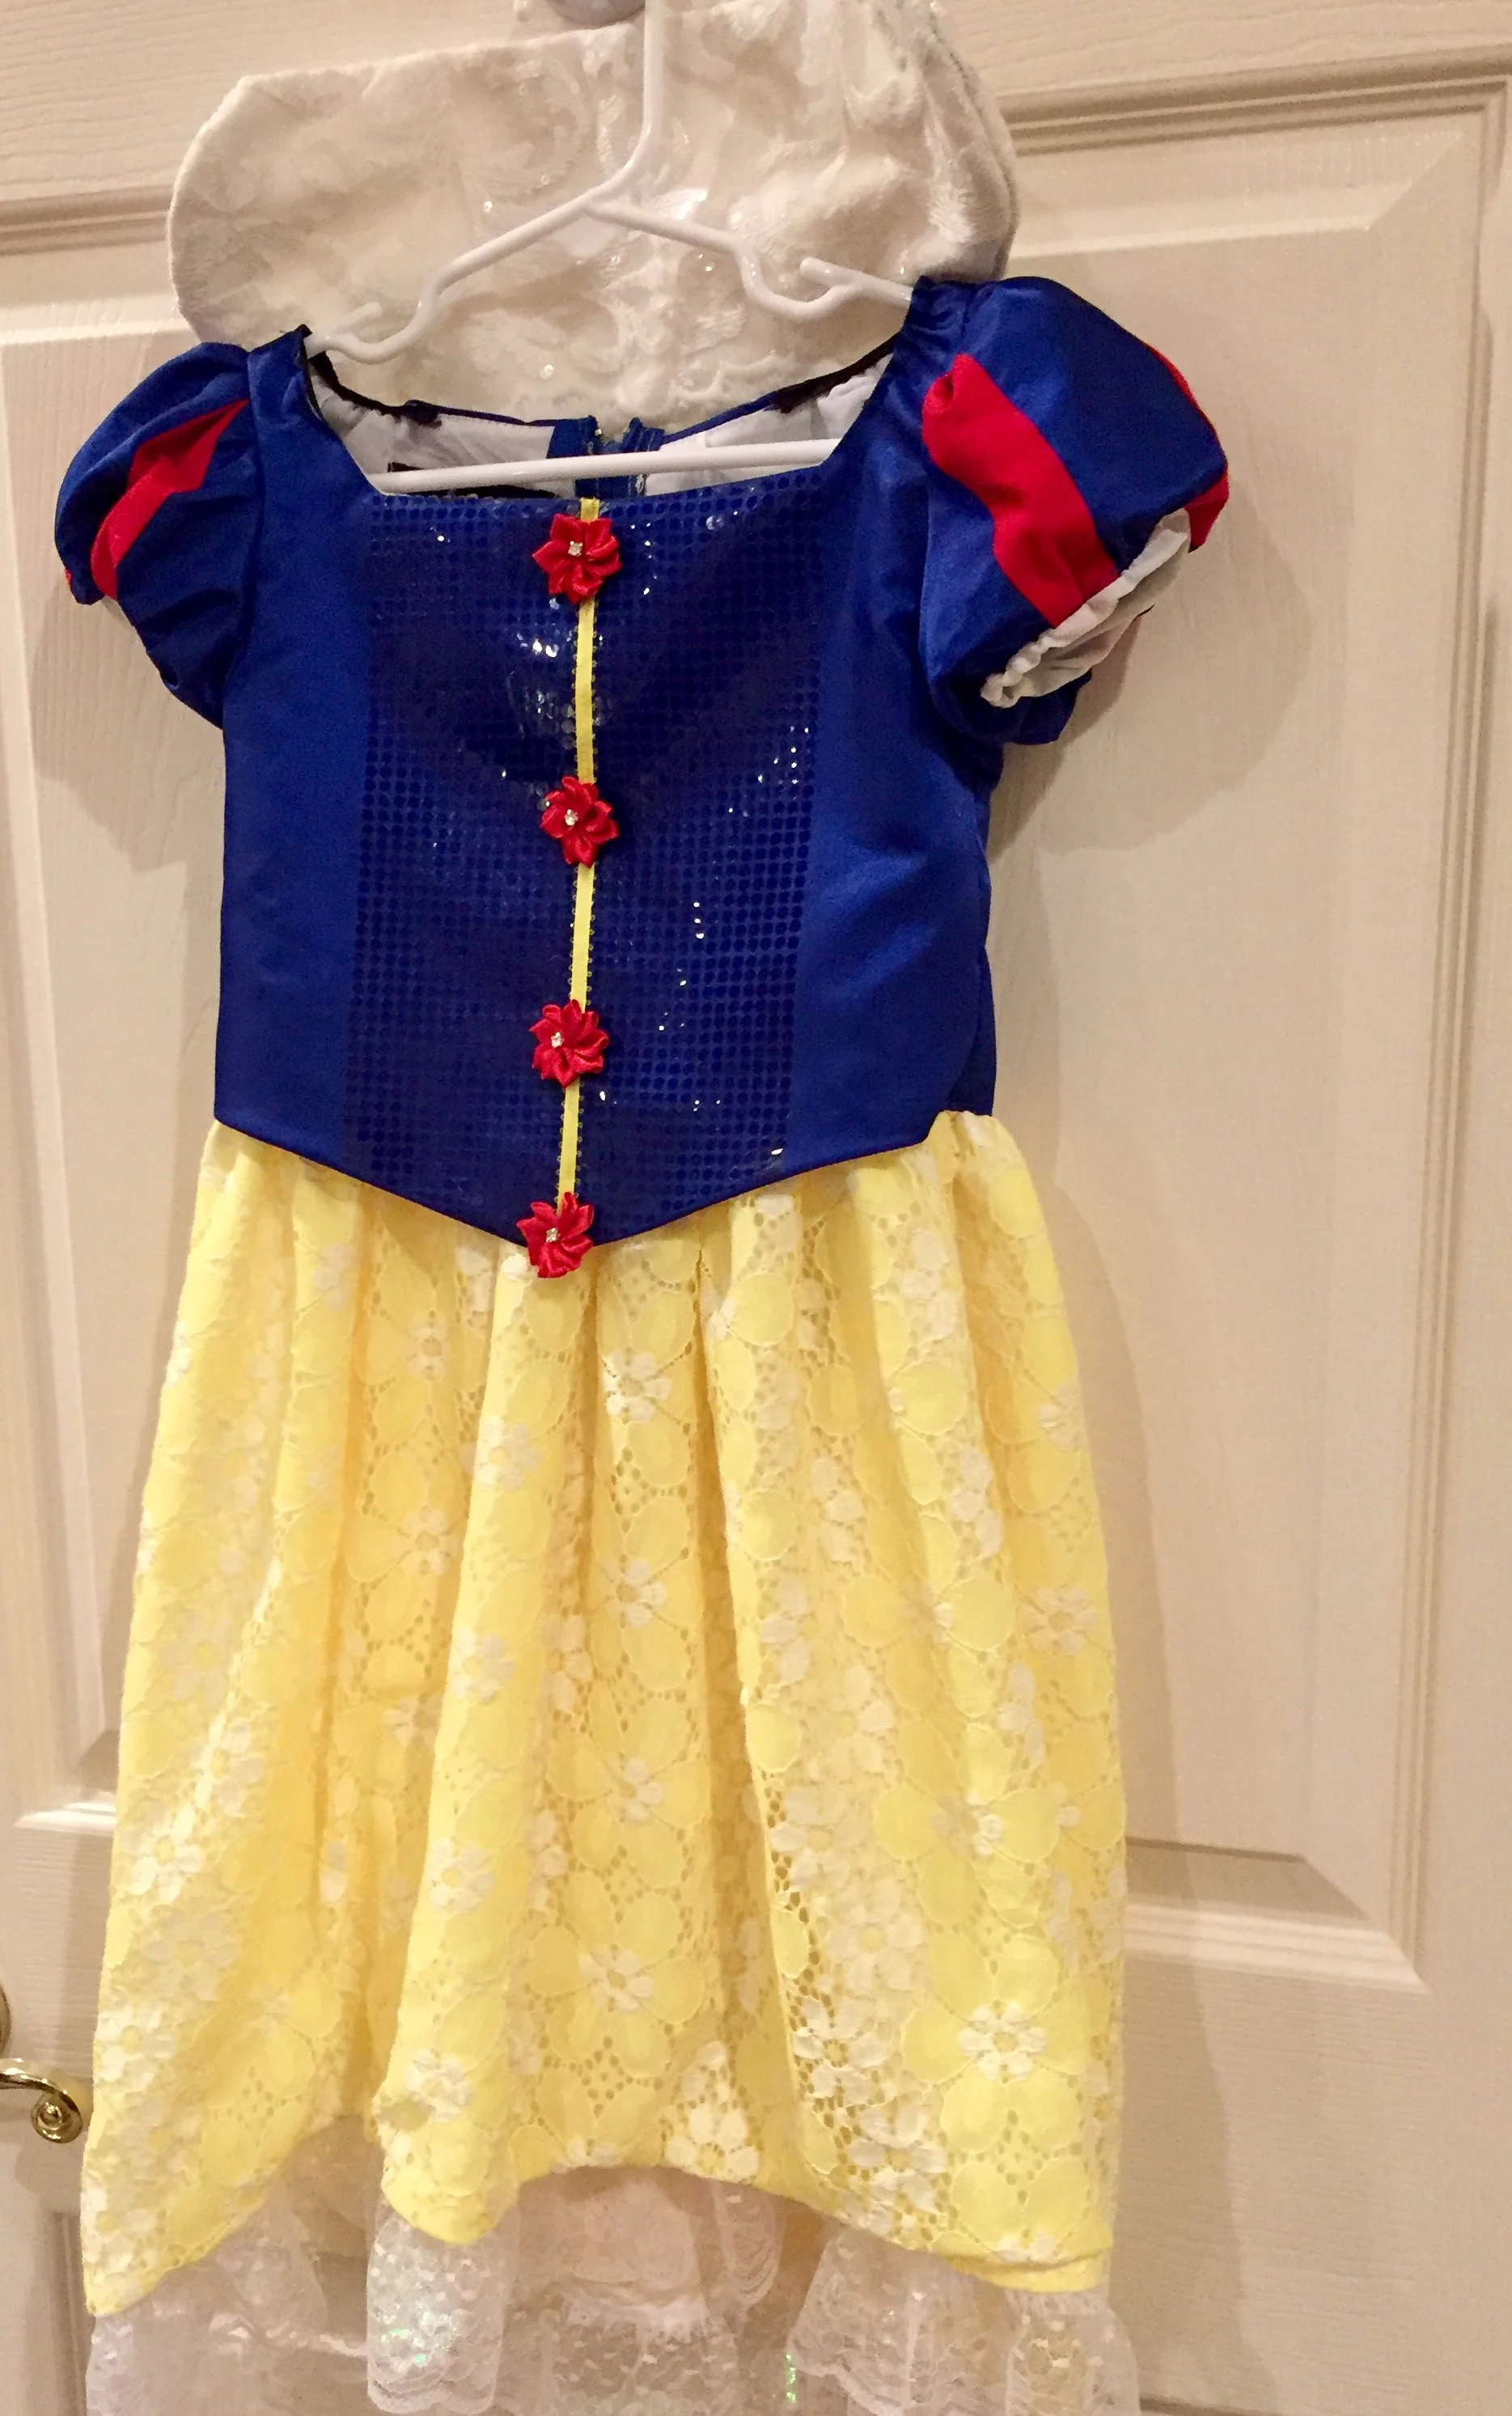
Finished dress with a hi-low hemline so she can run around without tripping and lots of texture to make her feel special ❤️💙💛