Quick sports hair clips!
Read moreEasy Maxi
Starting with pre-smocked fabric makes this project easy breezy.
1. Measure: chest, straps, front and back length (optional to make it hi-low hemline)
2. Based on how much the smocked fabric stretches, you may want to reduce the chest measurement 2-5", once you have that circumference, add 2" total for seam allowance (this accounts for french seam at center back).
3. With the fabric folded in half, I cut the center back seam straight down, but this is where the dress could be cut A-line and flare out a bit.
4. Next mark the CF height and the CB height and draw a curve blended line connecting them. Be sure to have a 90 degree angle at the CB so the hemline doesn't turn out pointy.

5. Mark 1" for CB seam allowance, then measure from there to CF fold line and mark the side seam. Having these markings, you can mark placement of straps. I did 2" in from CF and CB.

6. Cut straps to size (adding seam allowance). If they are thinner ribbon, you can fold each end under 1/2" or if they are thicker, you can use bonding tape and bias tape to clean the strap edge before attaching it to the dress.

7. Sew straps one at a time to back then loop down and sew the same strap to front.

Tip: If using non-bulky straps, you can place it bad side to bad side (raw edge of strap placed 1/2" below the top edge and stitch, then flip it up and stitch again), this will conceal the raw edge of the trim.


8. Sew CB seam via french seam (this is to keep it clean and avoid fraying without using an overlock machine). 5 needle stitch or single needle with overlock finish is the easiest if you have those machines, in camp we only use a single needle.

A) line up CB seam bad side to bad side and stitch 1/2" seam allowance.
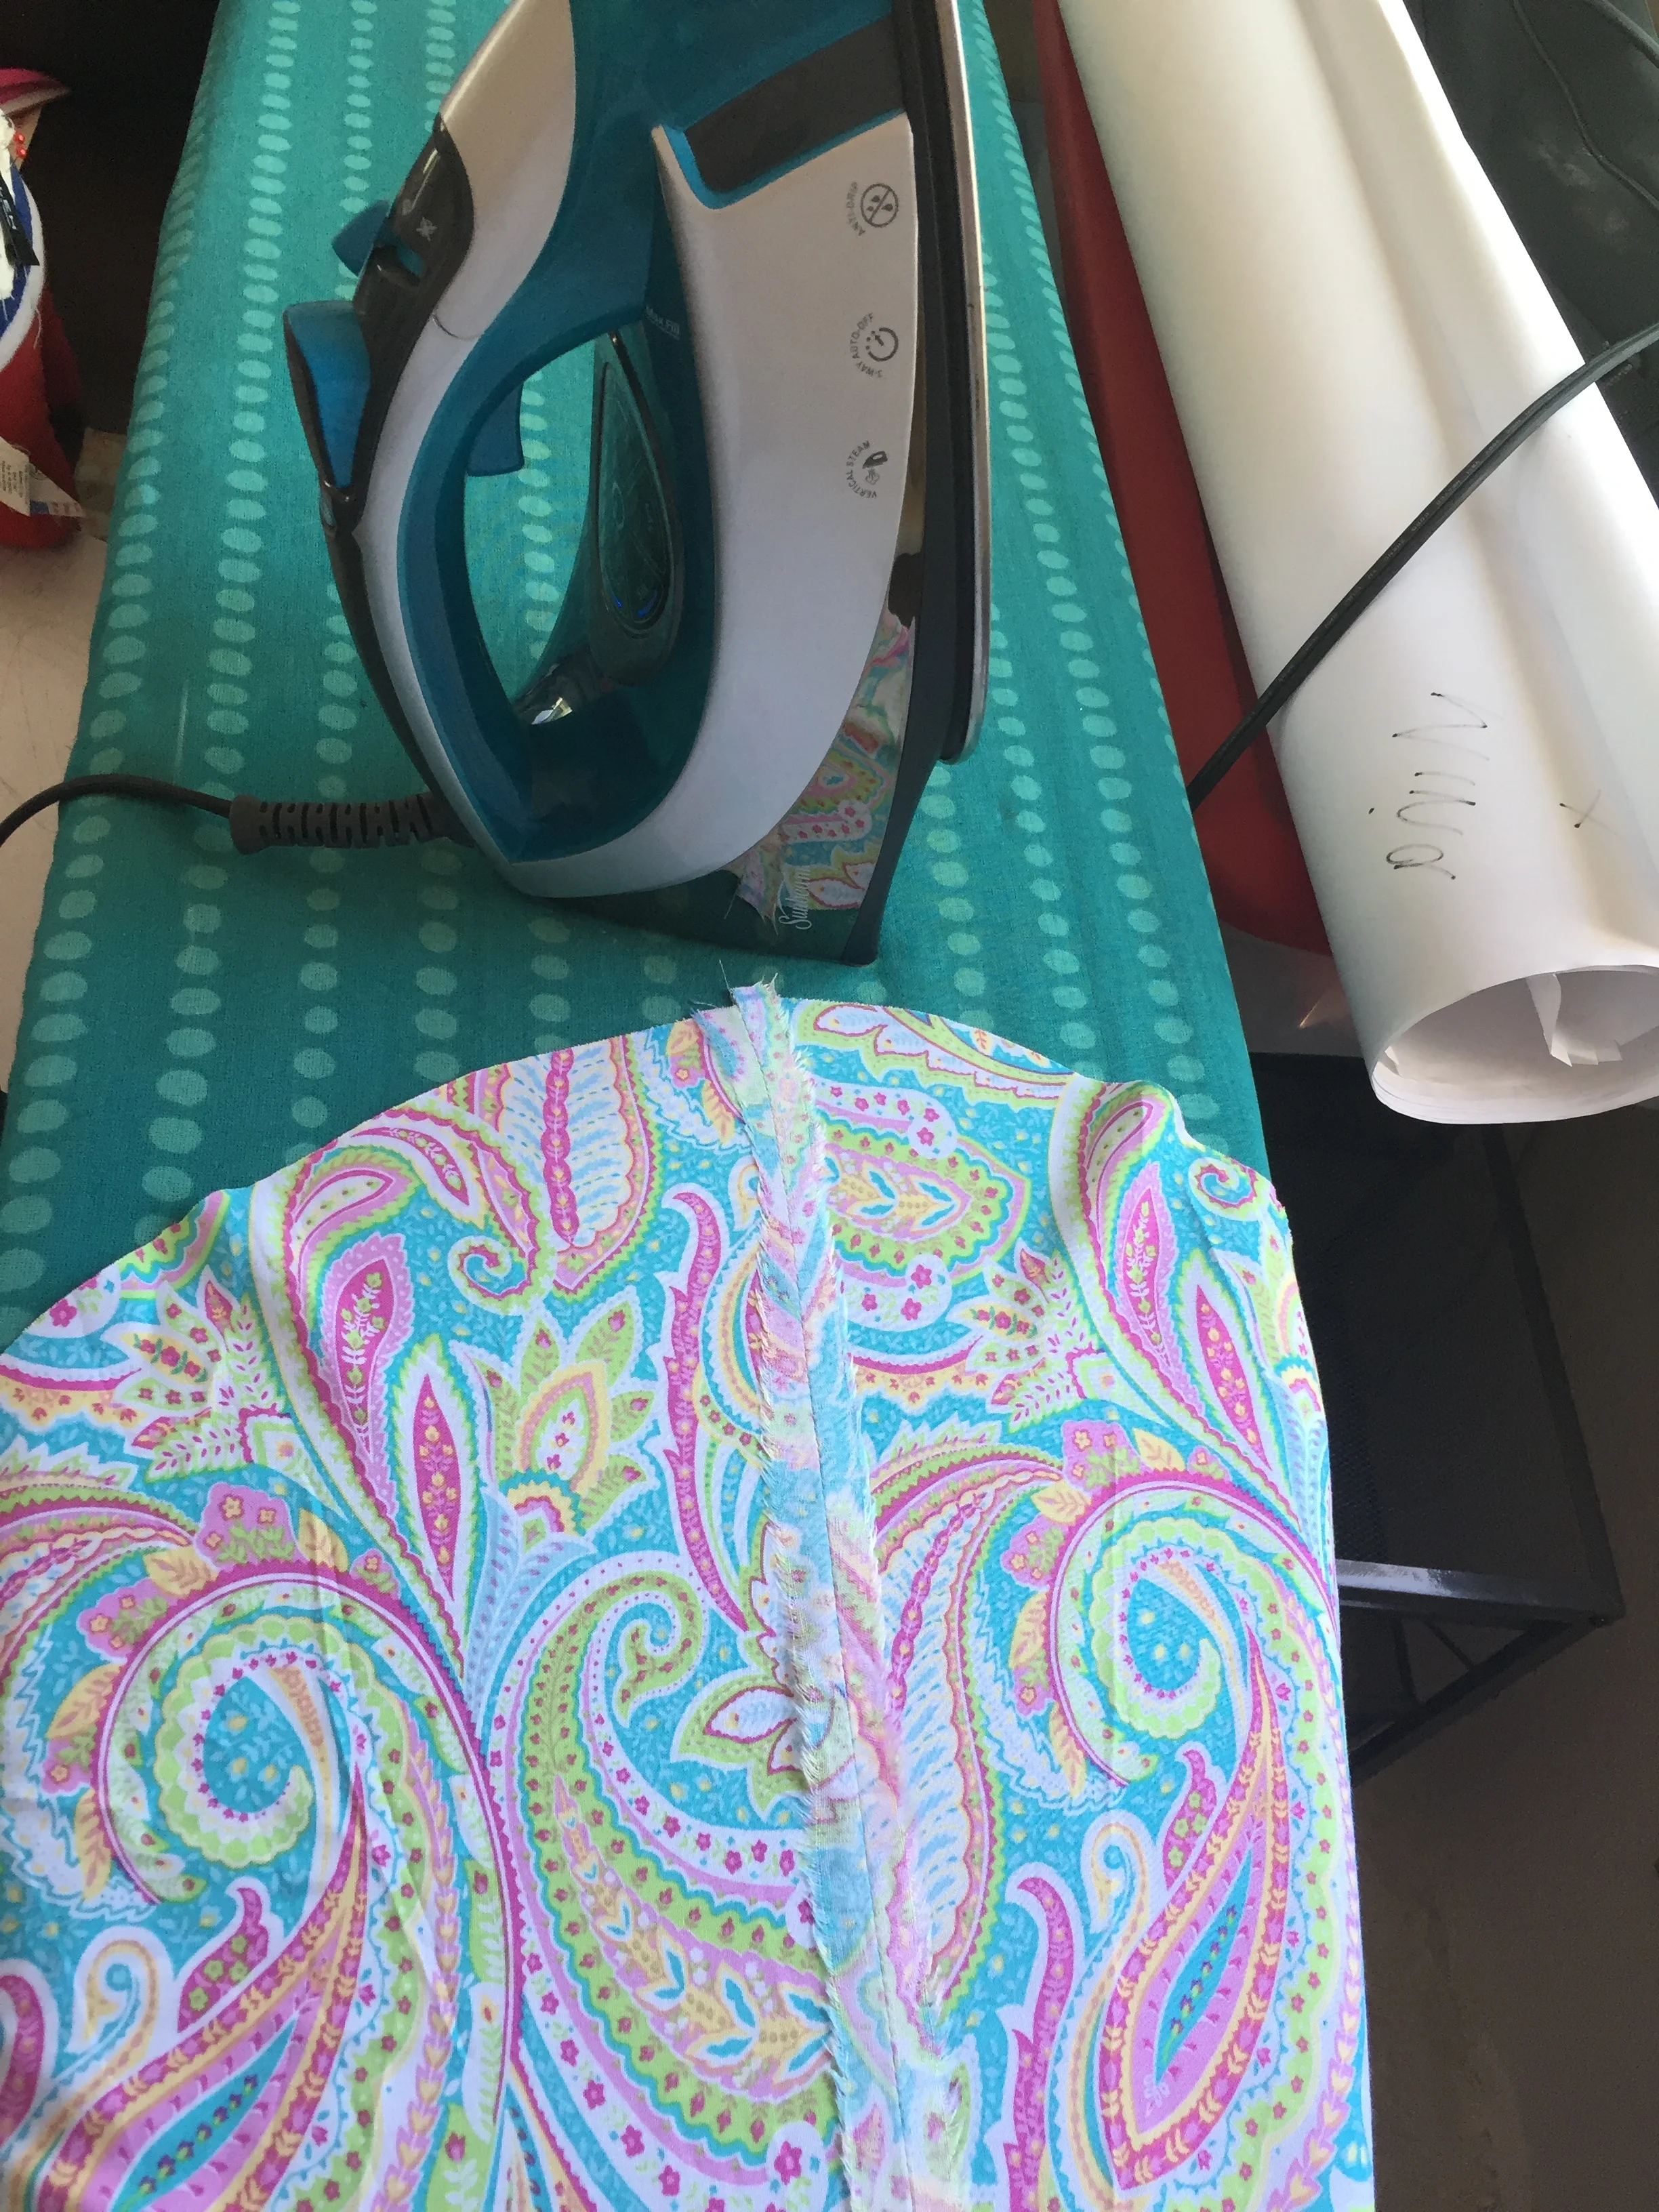
B) Iron seam open
C) Trim off each side separately down to 1/4"
*Skipping this step makes the end result bulky and messy.


D) Finish the french seam with a stitch at 1/2" good side to good side, concealing the raw edge completely.
9) Hem the bottom either by turning the edge up twice and doing a pin hem (requires a little bit of skill if you chose hi-low) or orvelock the edge, do a basting stitch and gather it, then flip up and stitch. This is because you are sewing on a curved hemline, if the hemline is straight, this step will not be tricky.


End result in 3 different fabrications:

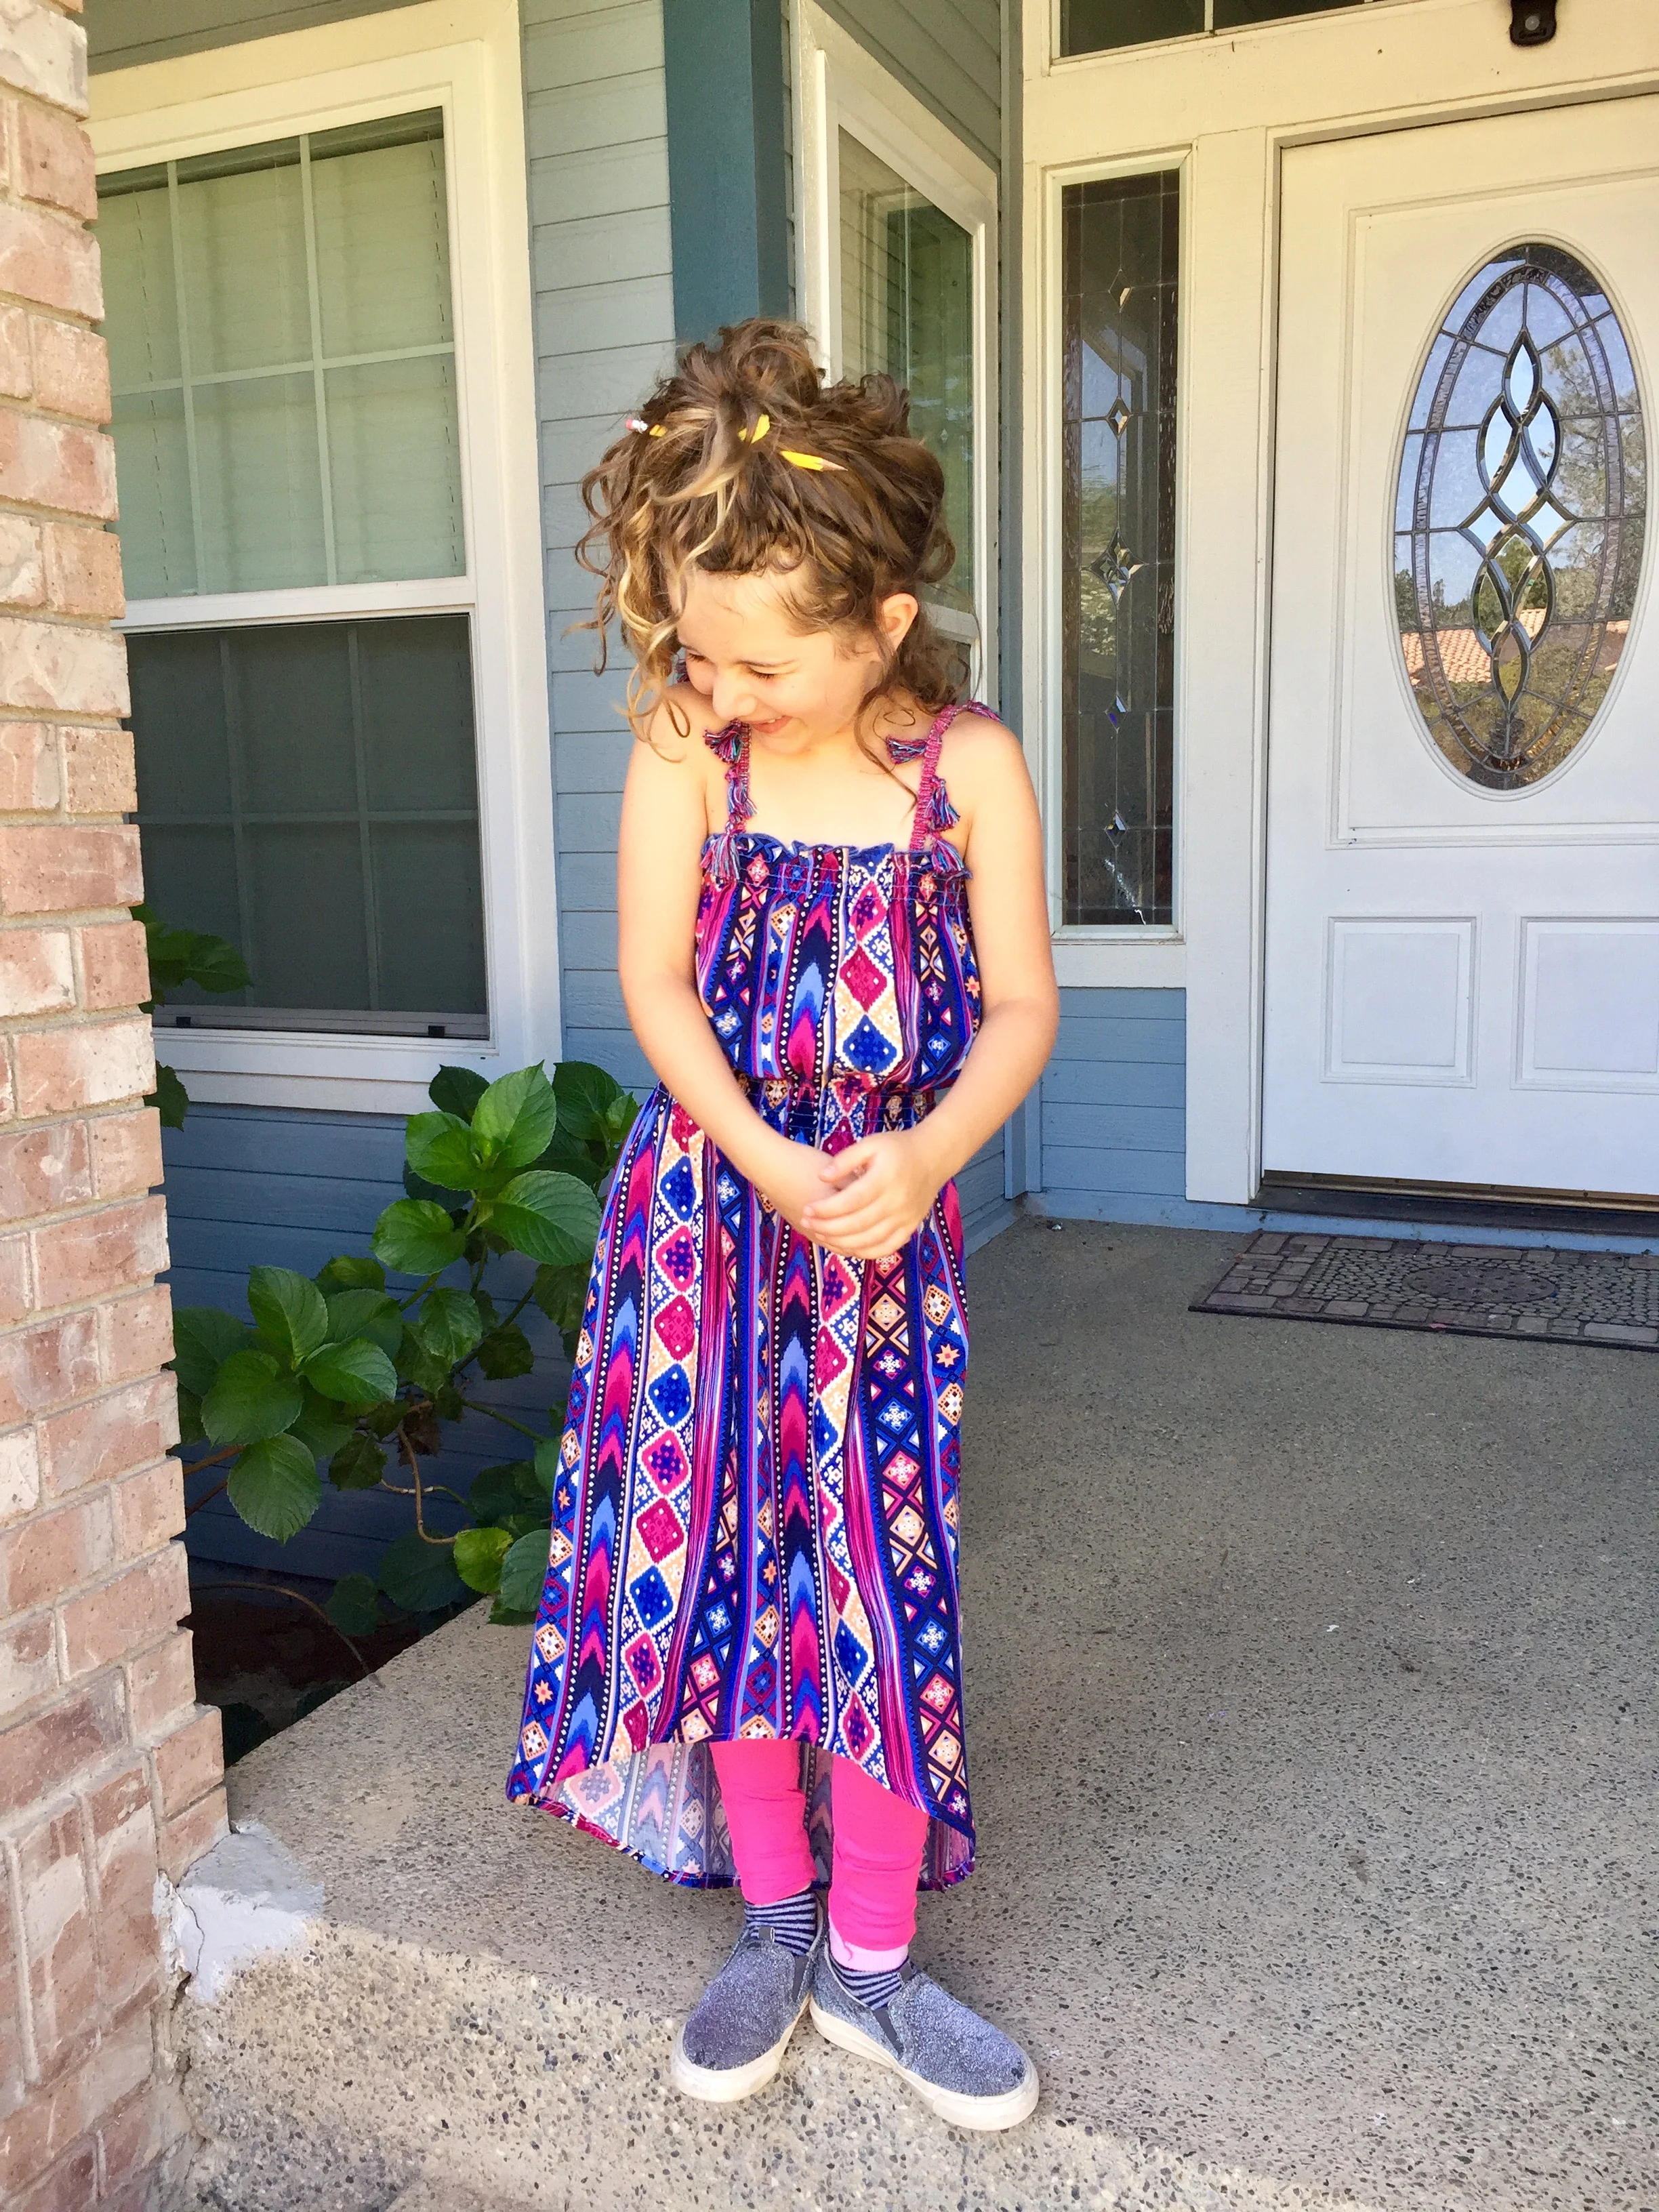
A looser fit is achieved with the style that has a few rows of smocking at the top and a few more at the waist.

Since this was smocked in the entire bodice, it needed more width, for this fabric I would only reduce the chest measurement by 2" to avoid the tighter fit.
I offered to make it looser for her, but she refuses to take it off for now!

Third style uses a cotton, making the dress one again pretty snug, so with this fabrication I would only reduce the chest measurement by 2".

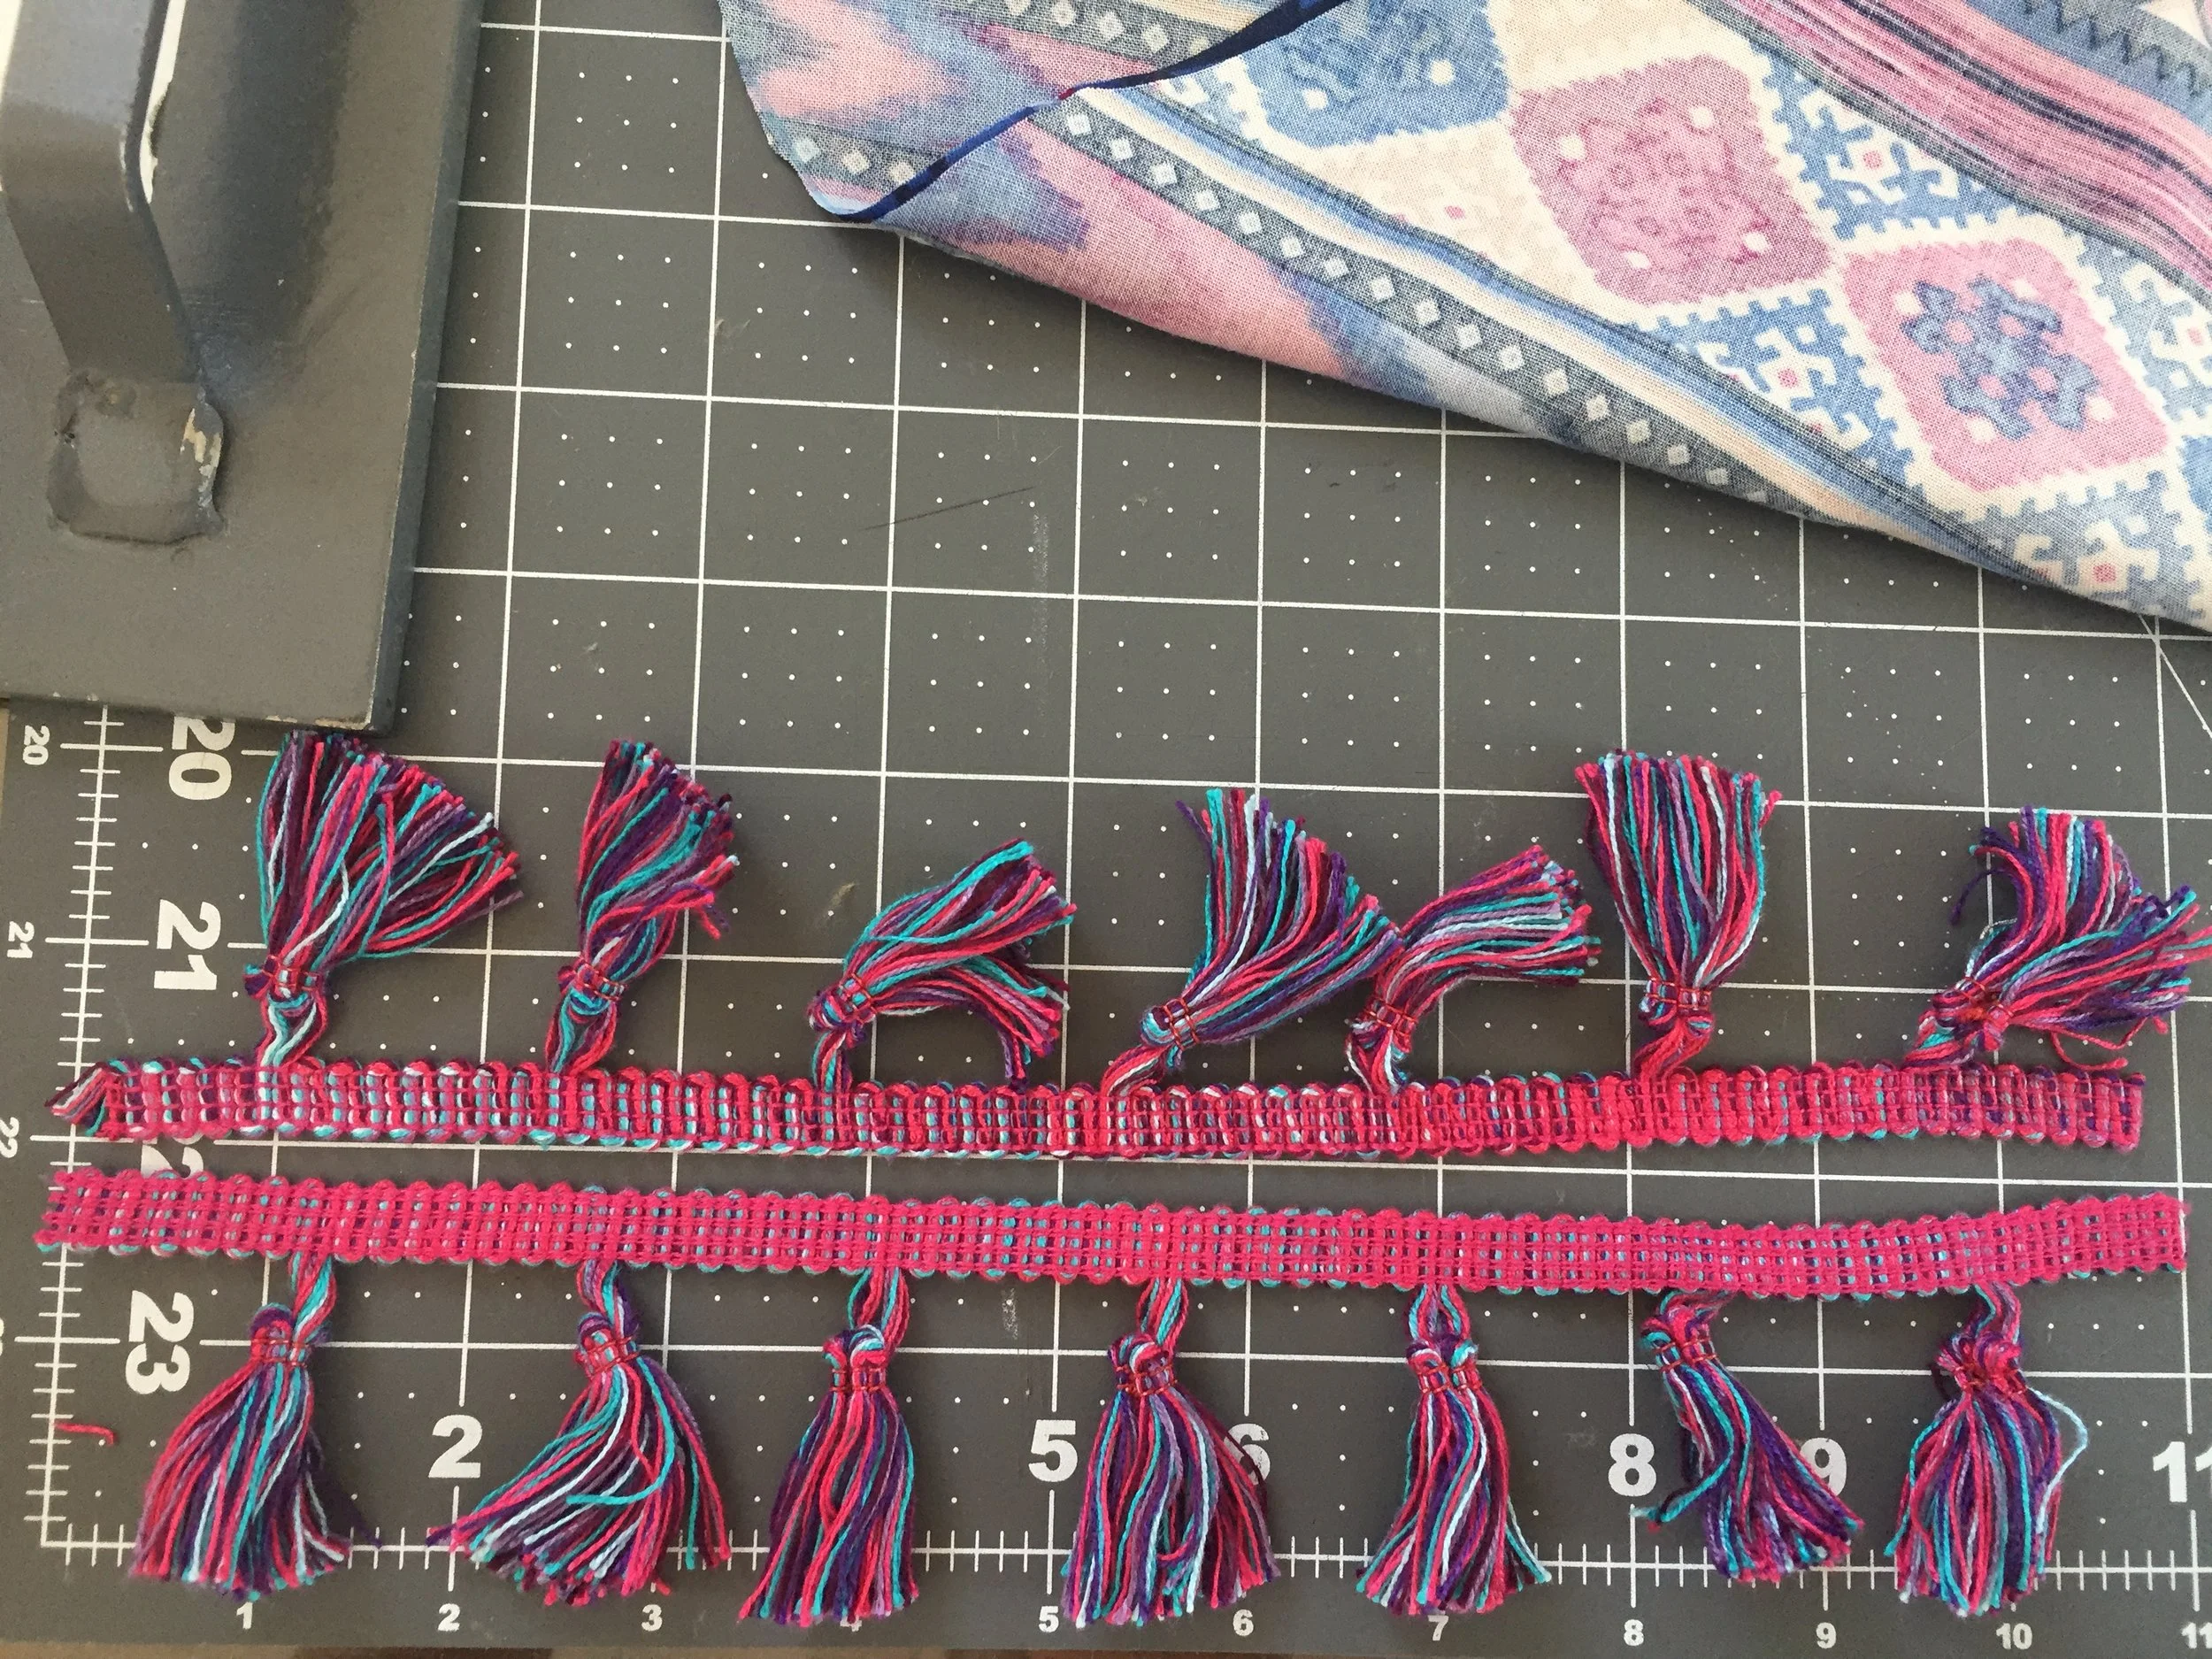
She also didn't find these ribbon straps comfy, so I changed them out to the poms (see below)


Fox Ears 🦊
Cat headbands from Amazon, felt and faux fur from the fabric store, ribbon and fake flowers optional.

Birthday girl gets to pick which fabrics to layer, we'll use leftovers for some fox tails.
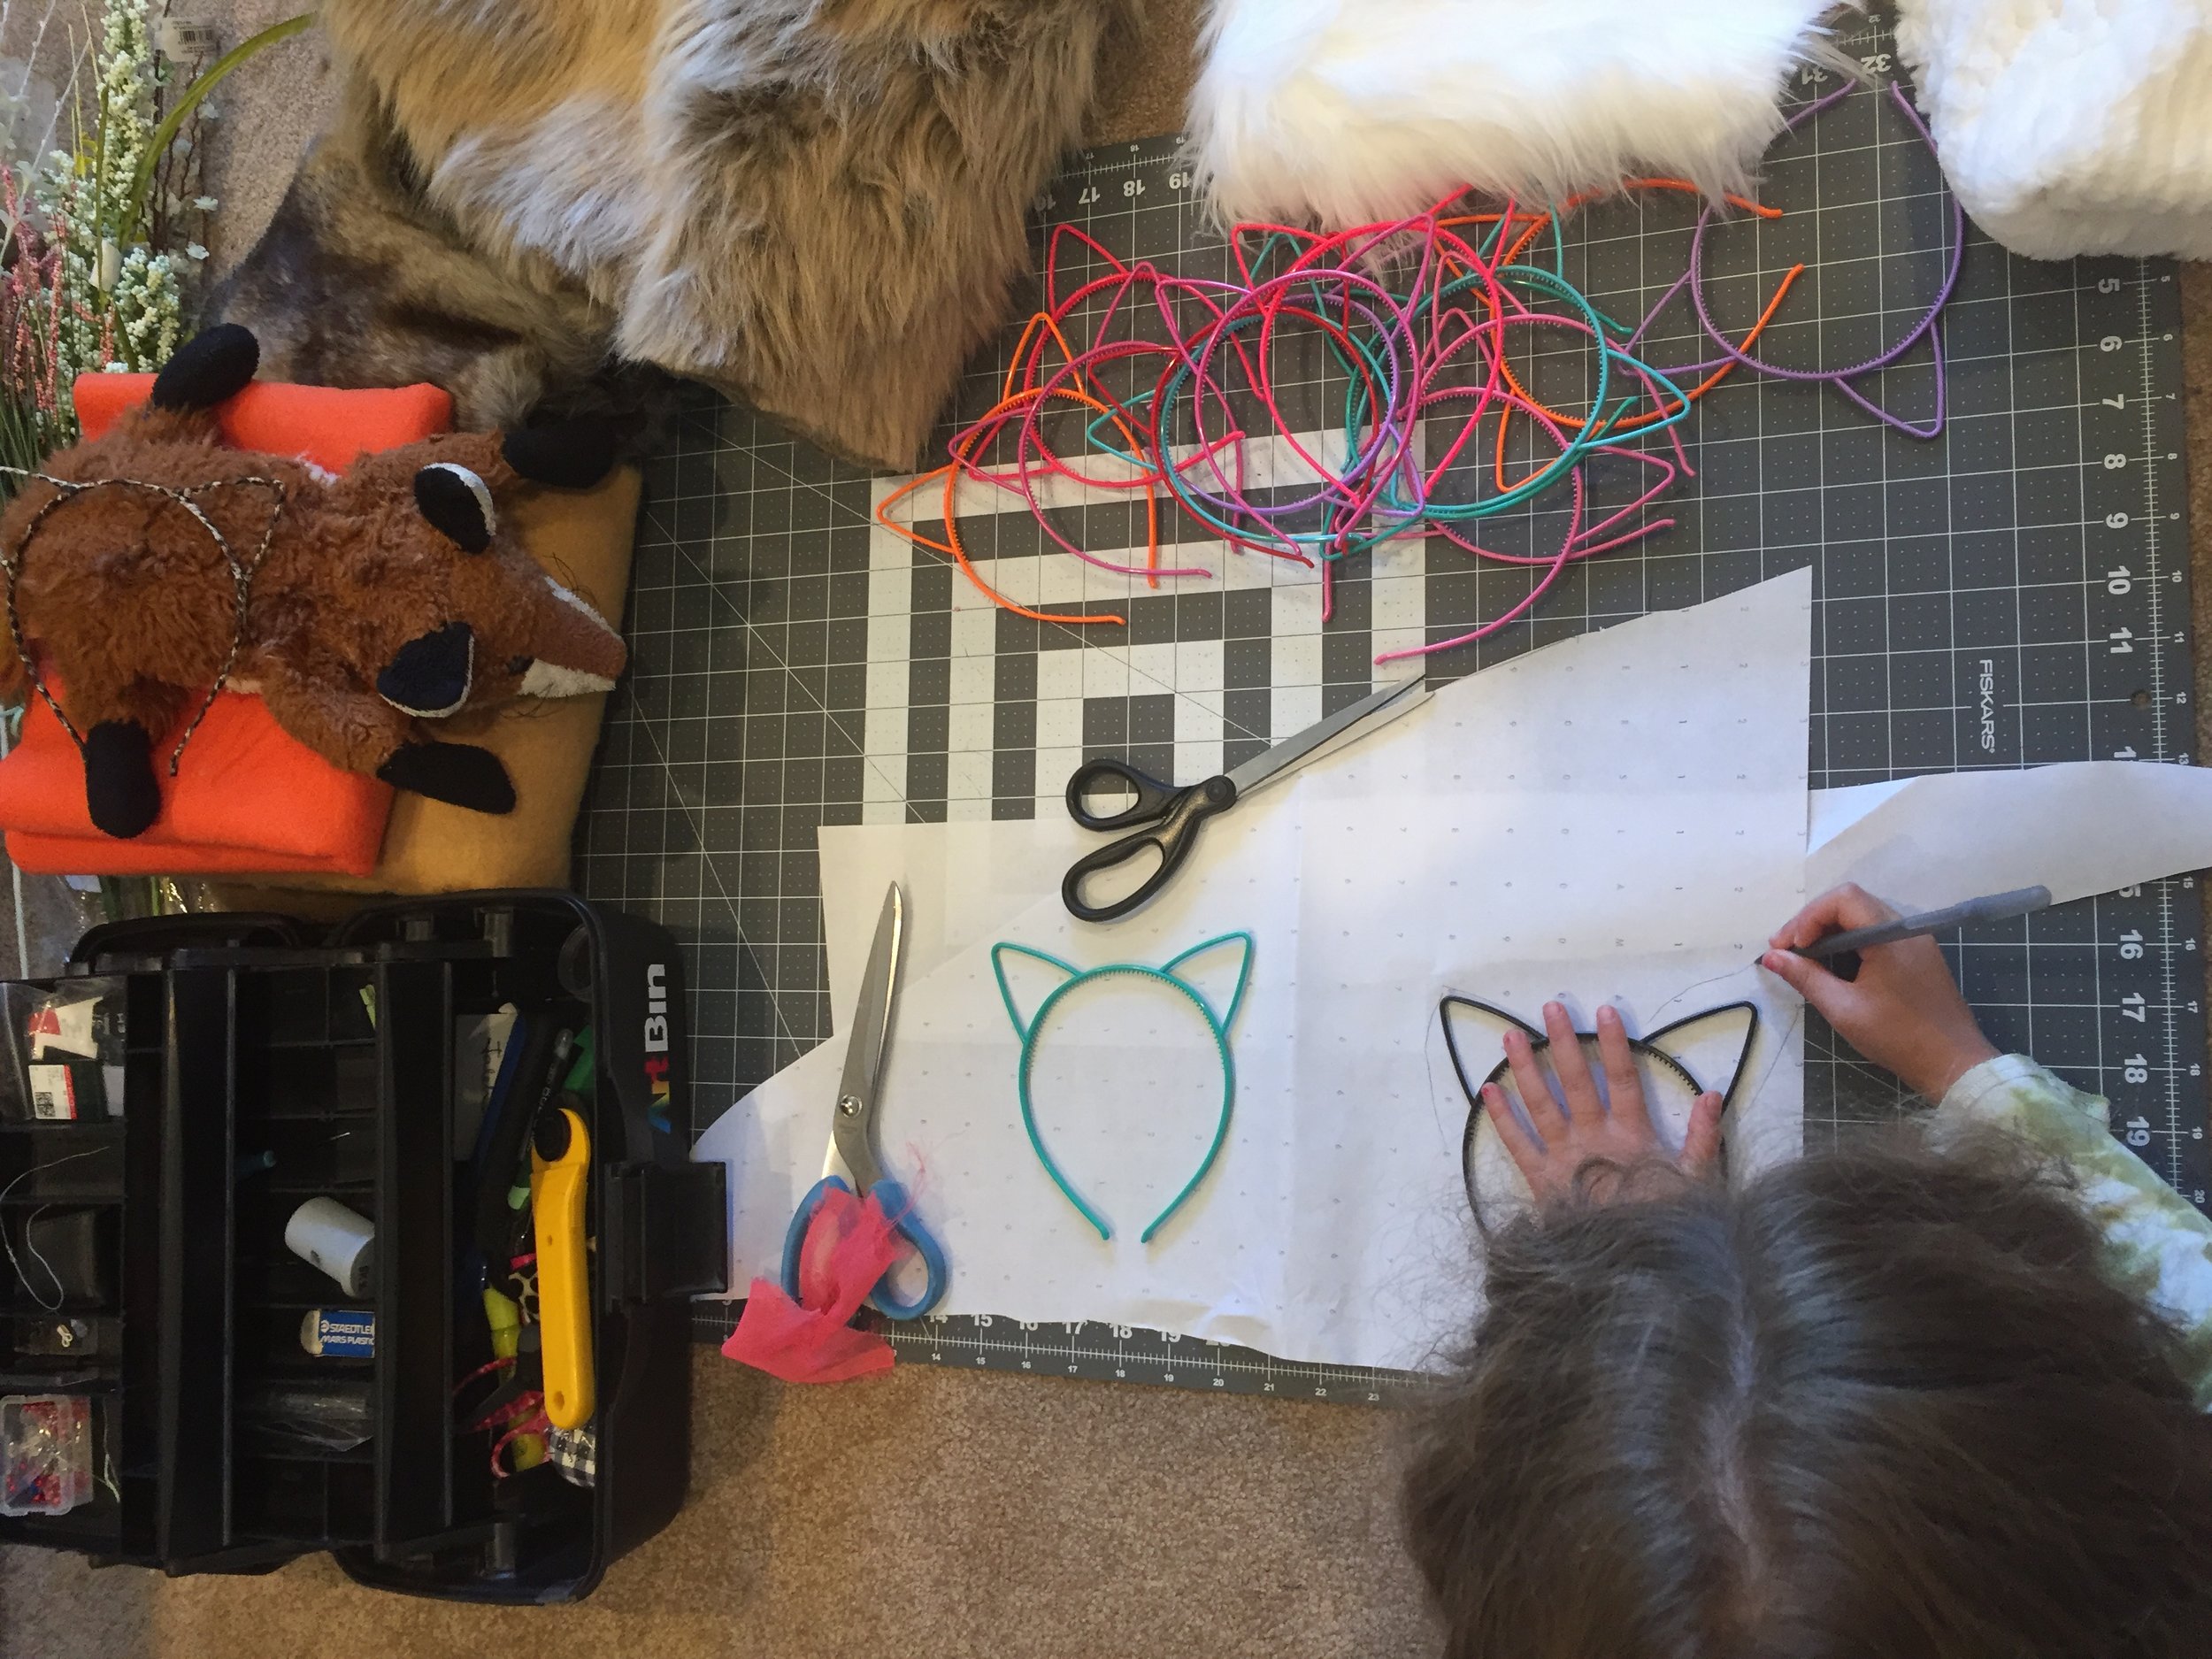
Trace around the ears for an inside pattern and freehand a larger outline for the outside part of the ear.

Always use a paper pattern for a guide.
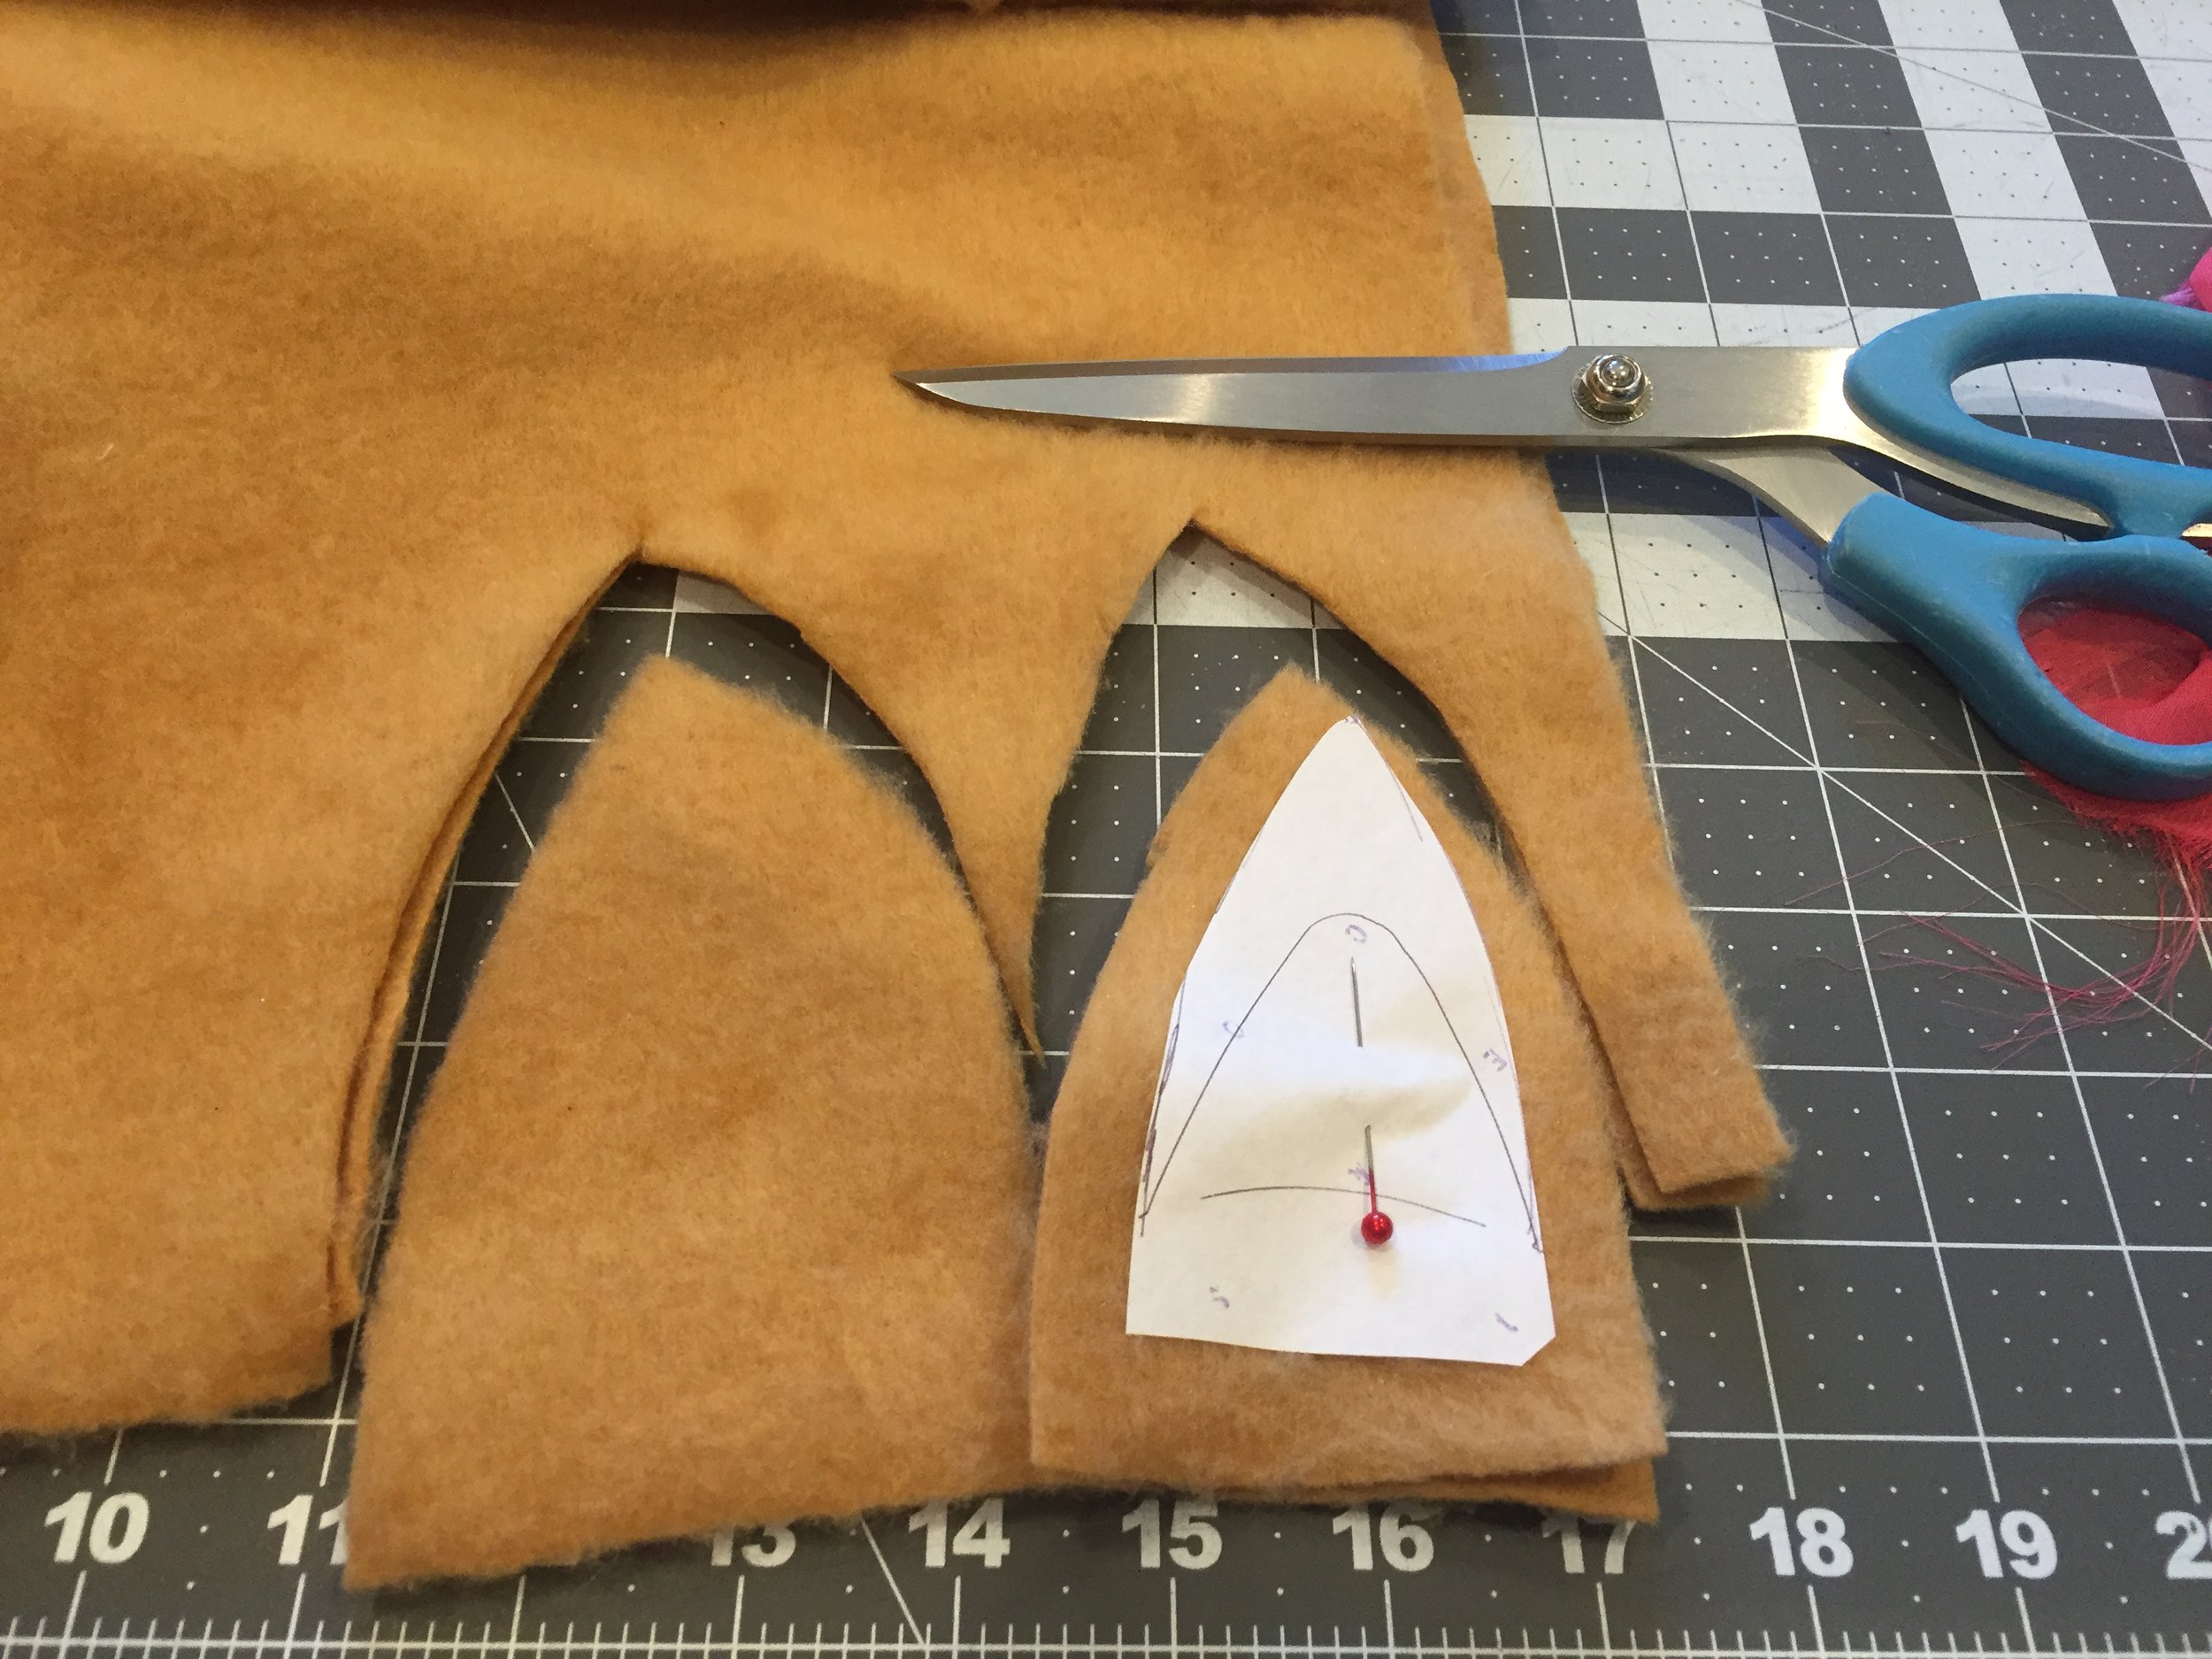
Cut 4 pieces of big ears.

2 pieces of inside/little ears from the fur. Pay attention to the nap, you want the fur to be vertical with the pointy peak on top.

Sew the little ear like a patch on one piece of big ear, repeat for the other side. Then place the patched big ear good side to good side with another big ear and stitch around the two sides to create a clean finish.
Flip the ears out and stitch a ribbon on each side, then place over the headband and sew or tie them closed.
Decorate with ribbon, flowers, tape and glue.
Share your finished ears with us @isabelazam

A Fox Life
Creative research for the upcoming fashion camp, inspired by the ever so FOXY 5 year old, Persia!

Raven's take on Snow White

Skill level: intermediate | Material cost ~$40 | Time: 8-10 hours
**you can order one via the shop tab with custom measurements and some optional tweaks.
When we decided to through a princess party for Ravens 3rd bday, I spent a few nights showing her pictures and asking which princess she wanted to be. I couldn't be happier with her pick of Snow White, my favorite Disney princess and her dad's too! Here is an overview of custom making one like this, takes about 8-10 hours (making patterns, cutting and sewing), I did it over three days, with lots of fittings in between bc it was just so adorable on her.

Materials. Her pick of the cotton lace floral yellow is my favorite part of this creation 💛
1.5 yds yellow fabric for skirt
2 Yds. Lining
1 roll lace trim
1 yd. Blue satin for bodice
1/4 yd. Red for sleeve inserts
1/2 yd. Yellow ribbon trim
12" regular zipper
1/4 yd. Stiff twill and lace overlay for collar
boning, elastic and snaps for neckline
red flower appliqués and heat transfer shimmer optional

Updated a basic bodice to have v-hemline, square neckline and fit her measurements.

Updated a basic sleeve to have 4 sections and retraced patterns w/ added Seam allowance.

Cut 2 of sleeve patterns and also a 2" strip of red fabric. Pieced in red piece as putting the sleeve together.

Closed the sleeve cap red pleated in a box pleat shape.

Gathered sleeve cap for fullness and shape.

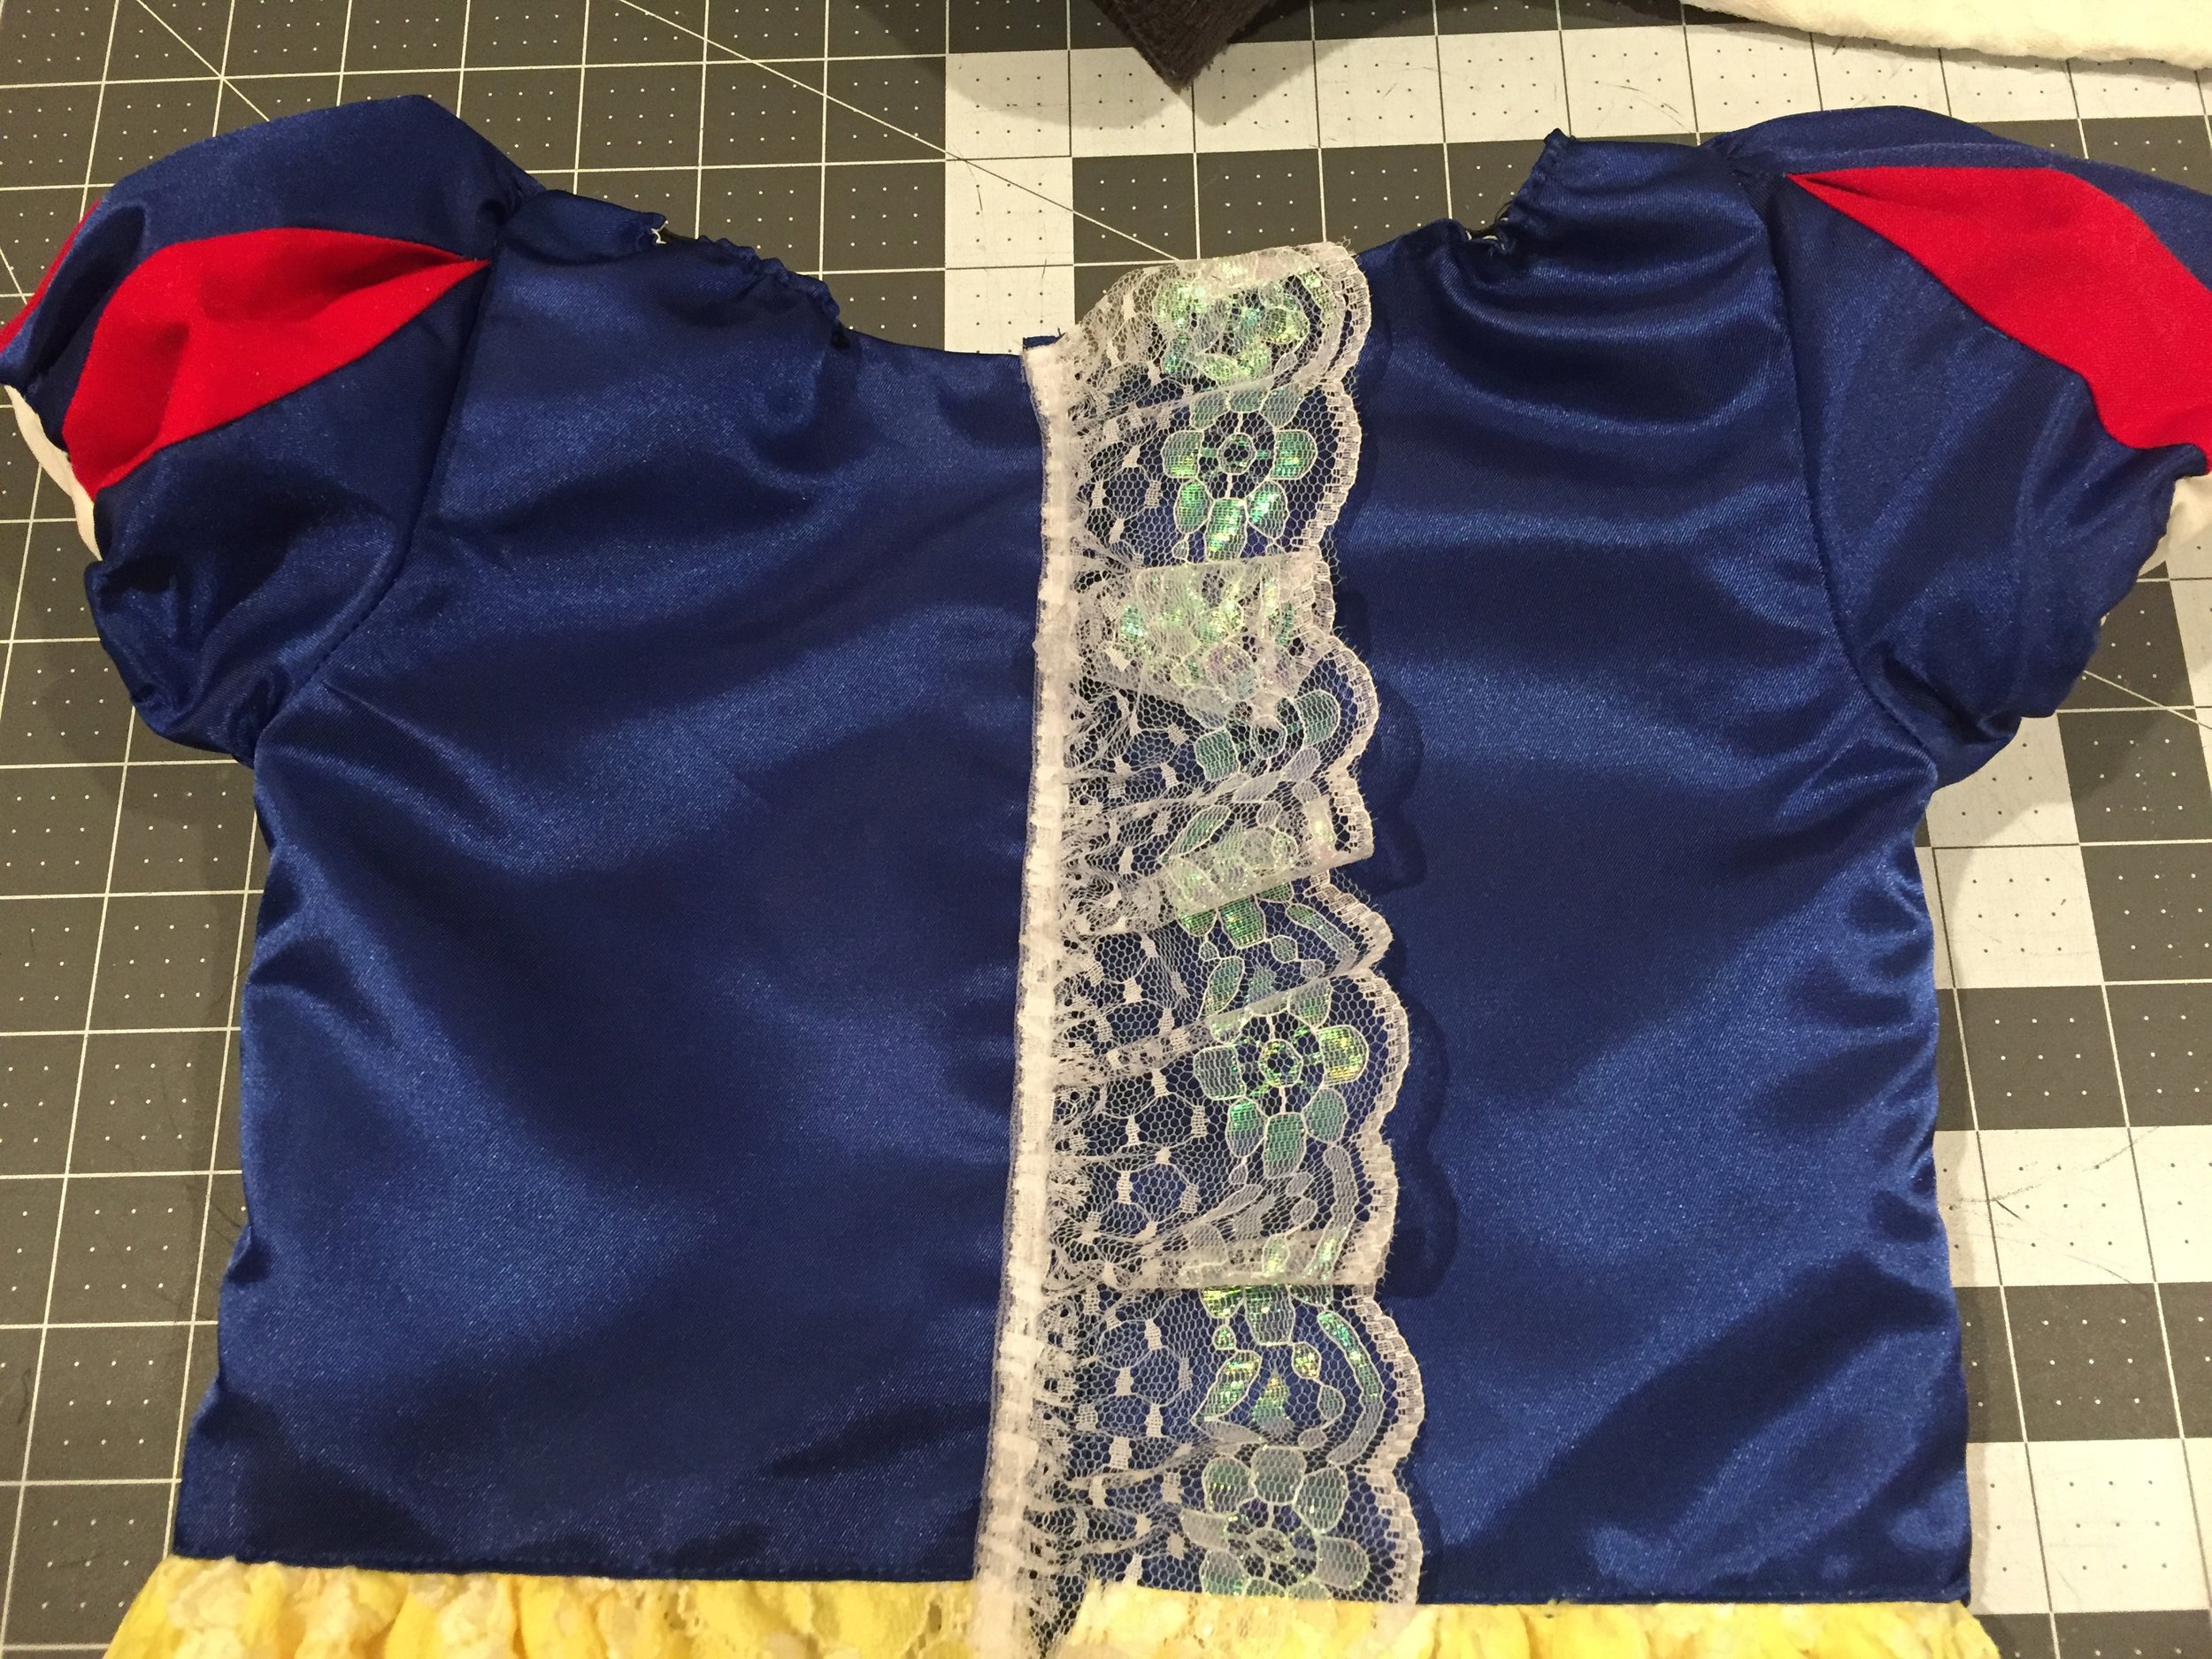
Once bodice is cut and sewn at shoulders, attached sleeves to bodice and top stitched yellow trim at CF. I also cut a facing for the hemline (front only) so the V would be nice and crisp.

Cut and sewed the lining using the original sleeve pattern, left CB seam open.

Hand stitched flowers (I let her pick between sleeve and CF). I've noticed having a say in details makes kids more emotionally attached to the garment, giving it value.

Cut collar using measurements from neckline. Using stuff twill as base and a lace embroidered fabric she picked as overlay. Sewn all around only leaving neckline open.

Added a piece of boning to the inside so the collar would curve in around her neck.

Natural shape of the boning in collar.

Attached lining to self around neckline and finished with a holding stich, flipping seam allowance towards lining. This ensures the lining doesn't peak out when flipped inside.
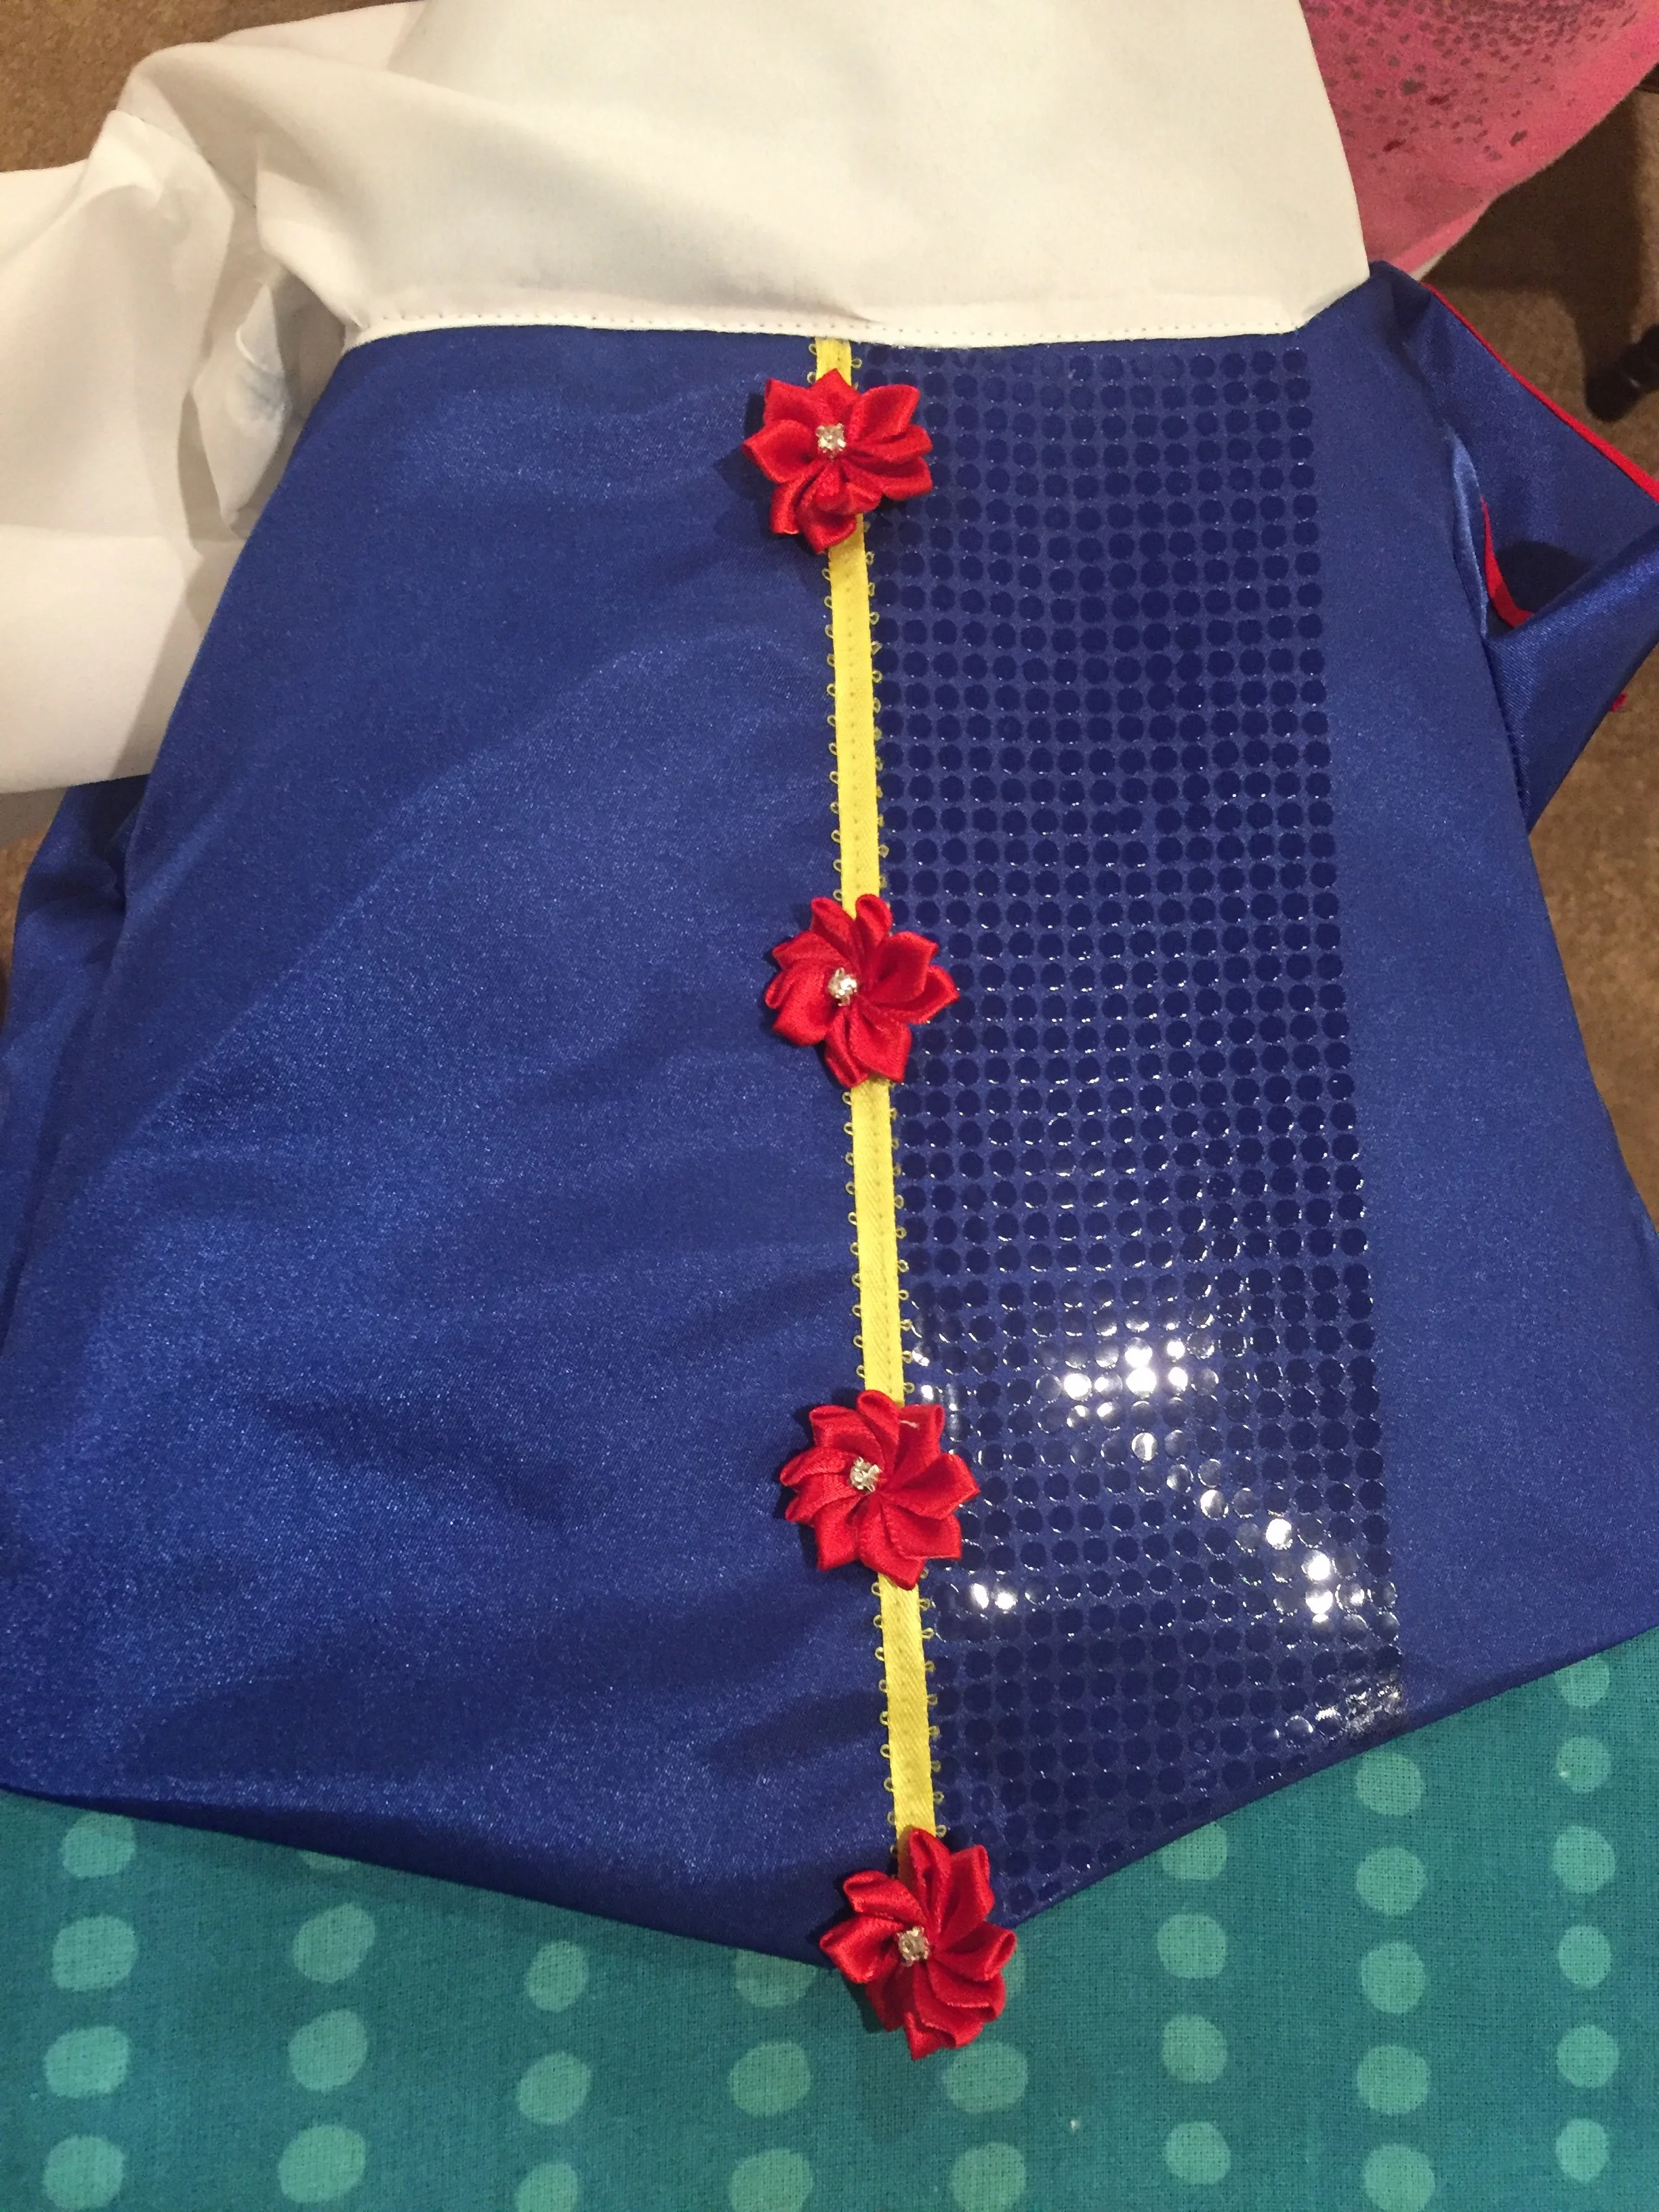
This is when she tried it on and was kinda "eh", so her sister suggested glitter! Which reminded me of leftover iron on shimmer I had from when I was an assistant designer at St. John Knits http://www.stjohnknits.com/ a decade ago. (This is why I have so much stuff)!
💕 and I have to say this really made the front pop!
i don't have pics. Of the hardest part 😲 attaching the sleeve lining to the self bc I had to give my phone to the kids to watch a show so I could think clearly, which is exactly what it takes in order to sew that part right.

Moving onto the skirt, I used the whole width of the fabric and cut lining to match self. Attached them at the hemline, top stitching the ruffle trim, sewing CB (leaving about 3" for zipper at WB) and then gathered them together at the waistline.

Tip: to create a ruffle peak effect, cut the lining shorter than self so the top layer folds over the bottom.


Then I attached the bodice lining to skirt, creating a very clean inside. I pressed back bodice SA up and top-stitched it to the skirt, flipping it around to sew the v-facing to the front part of the skirt (this part is confusing).

One more fitting before the zipper to check measurements.

Attached the zipper and also added some elastic at neckline to keep it nice and snug on her shoulders.
I didn't 💙 the zipper tape showing and had some leftover trim, so I stitched this on top to add some fun in the back and hide the zipper.

Finishing touches, putting snaps on the collar and on the back neckline. A way around this is not doing a zipper (need knit fabrics) or doing a side zipper. However, I prefer removable accessories bc kids tend to be moody about them anyway.
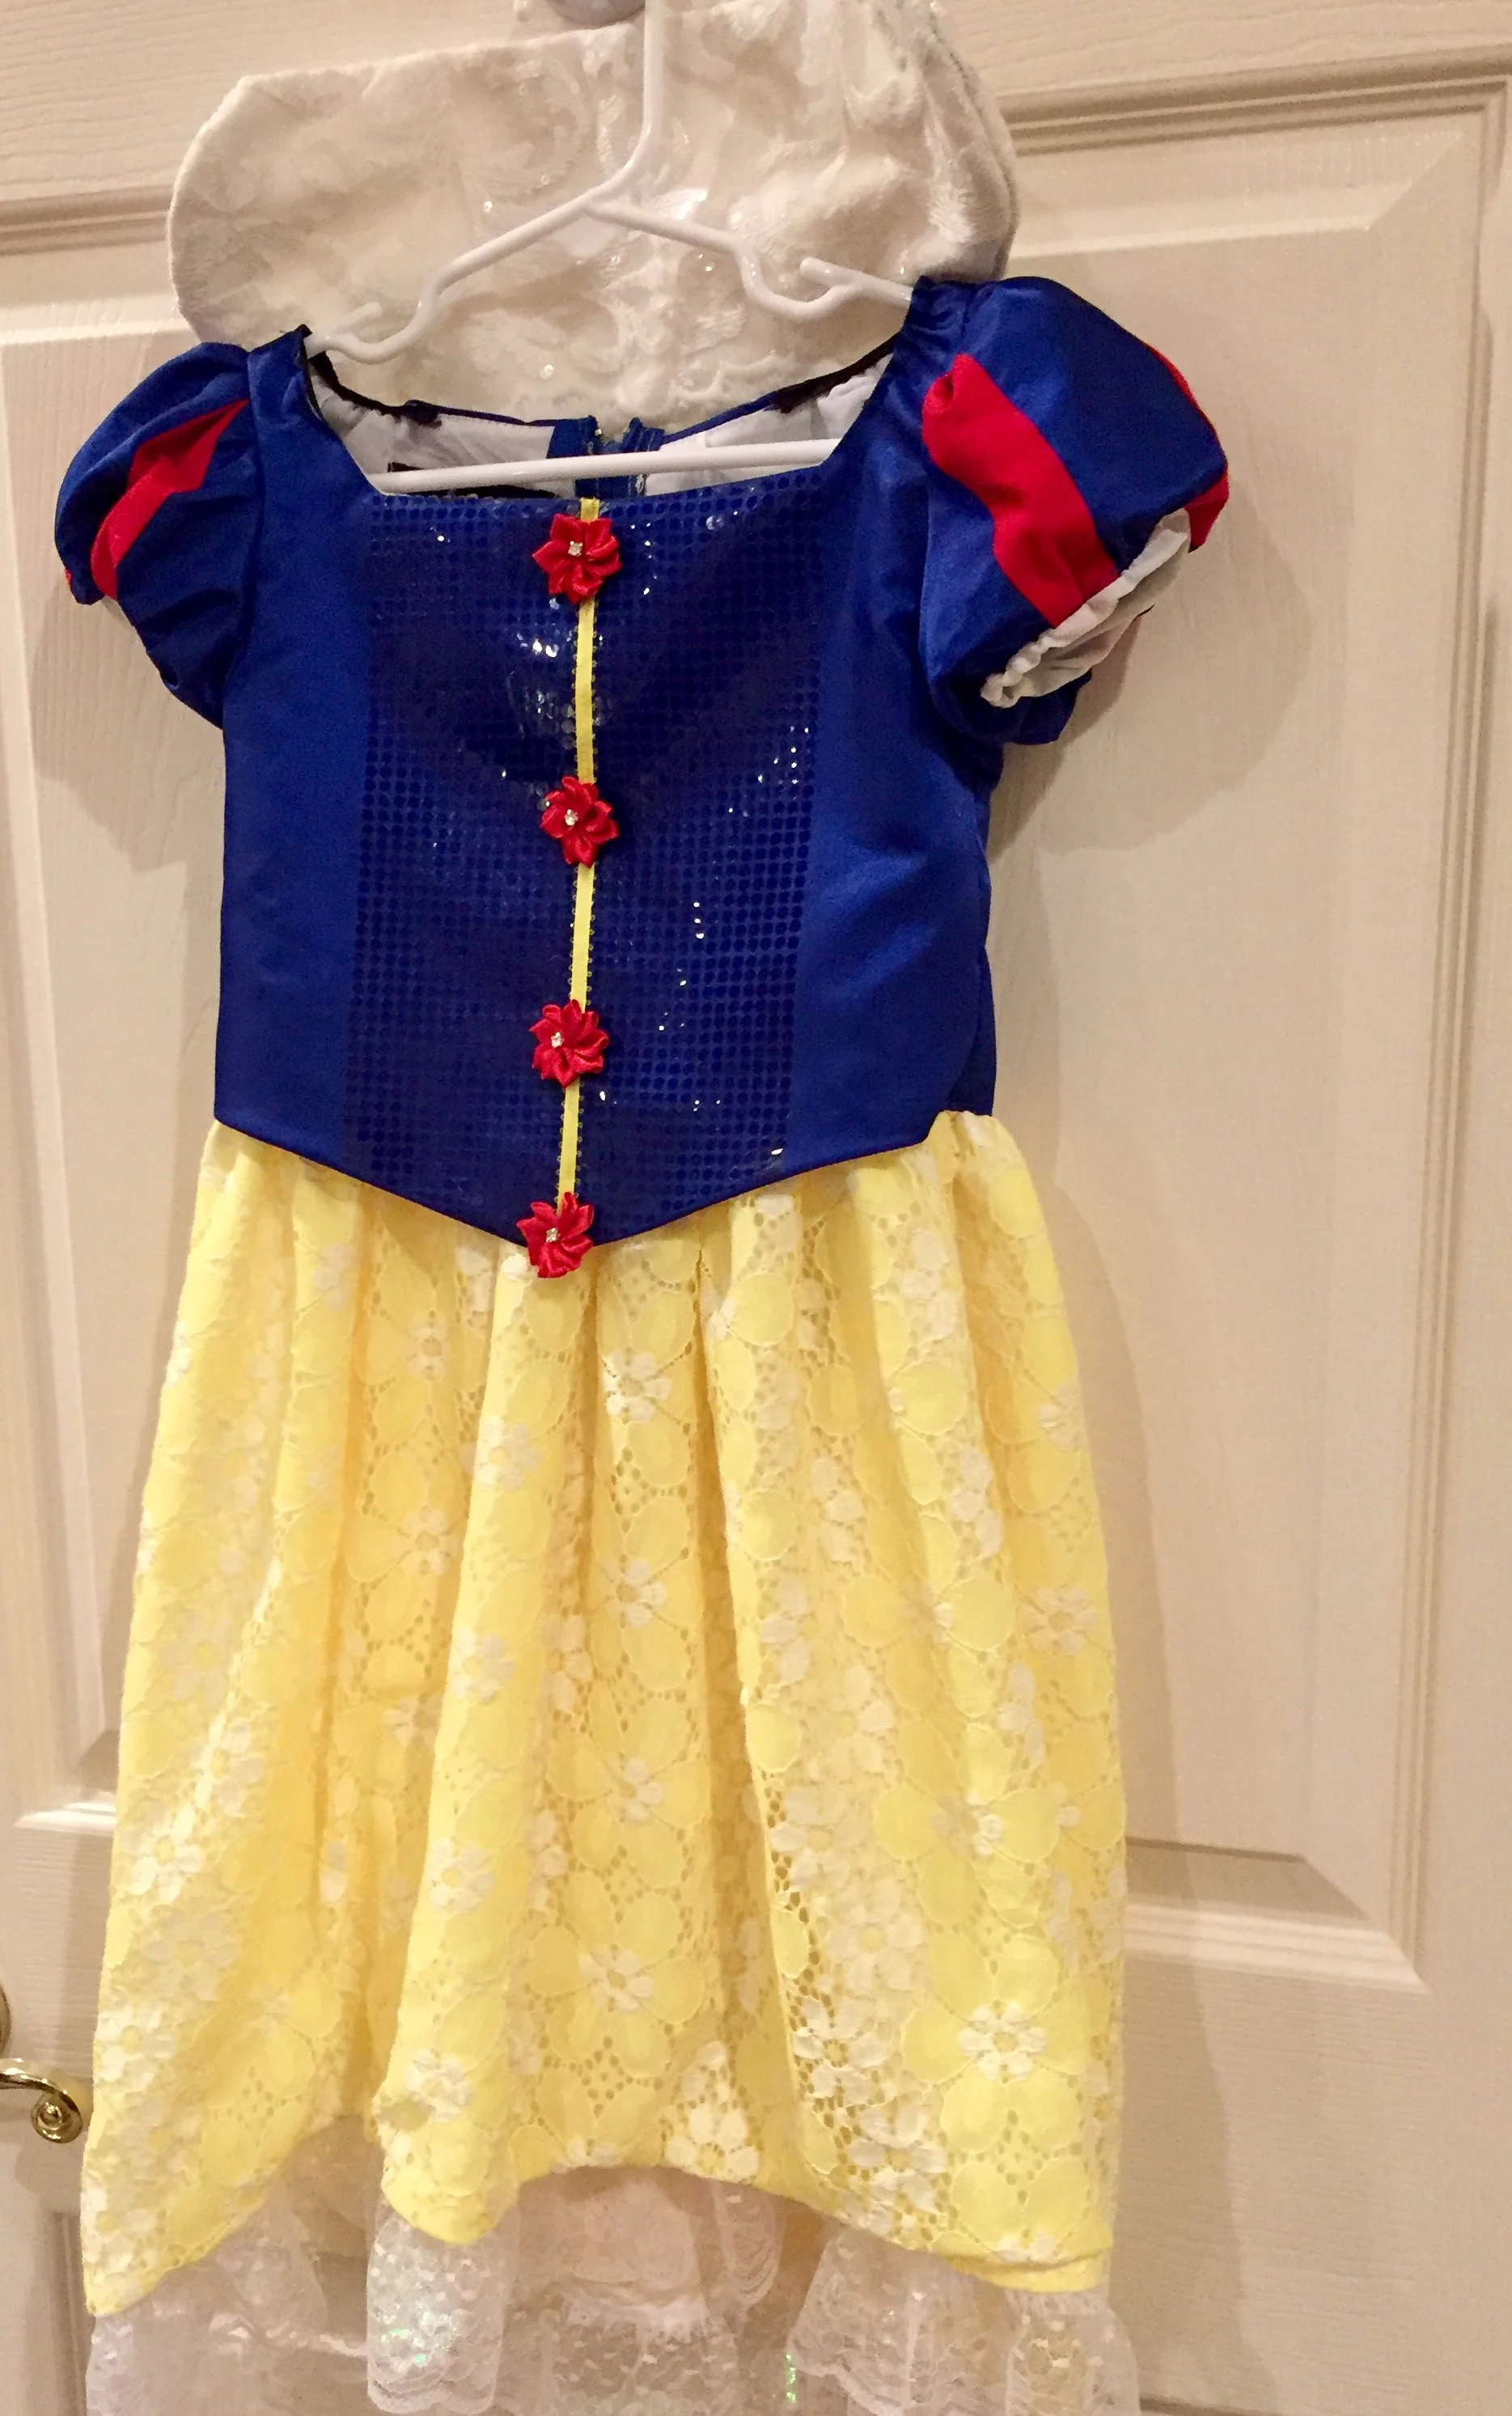
Finished dress with a hi-low hemline so she can run around without tripping and lots of texture to make her feel special ❤️💙💛
Scroll invitation
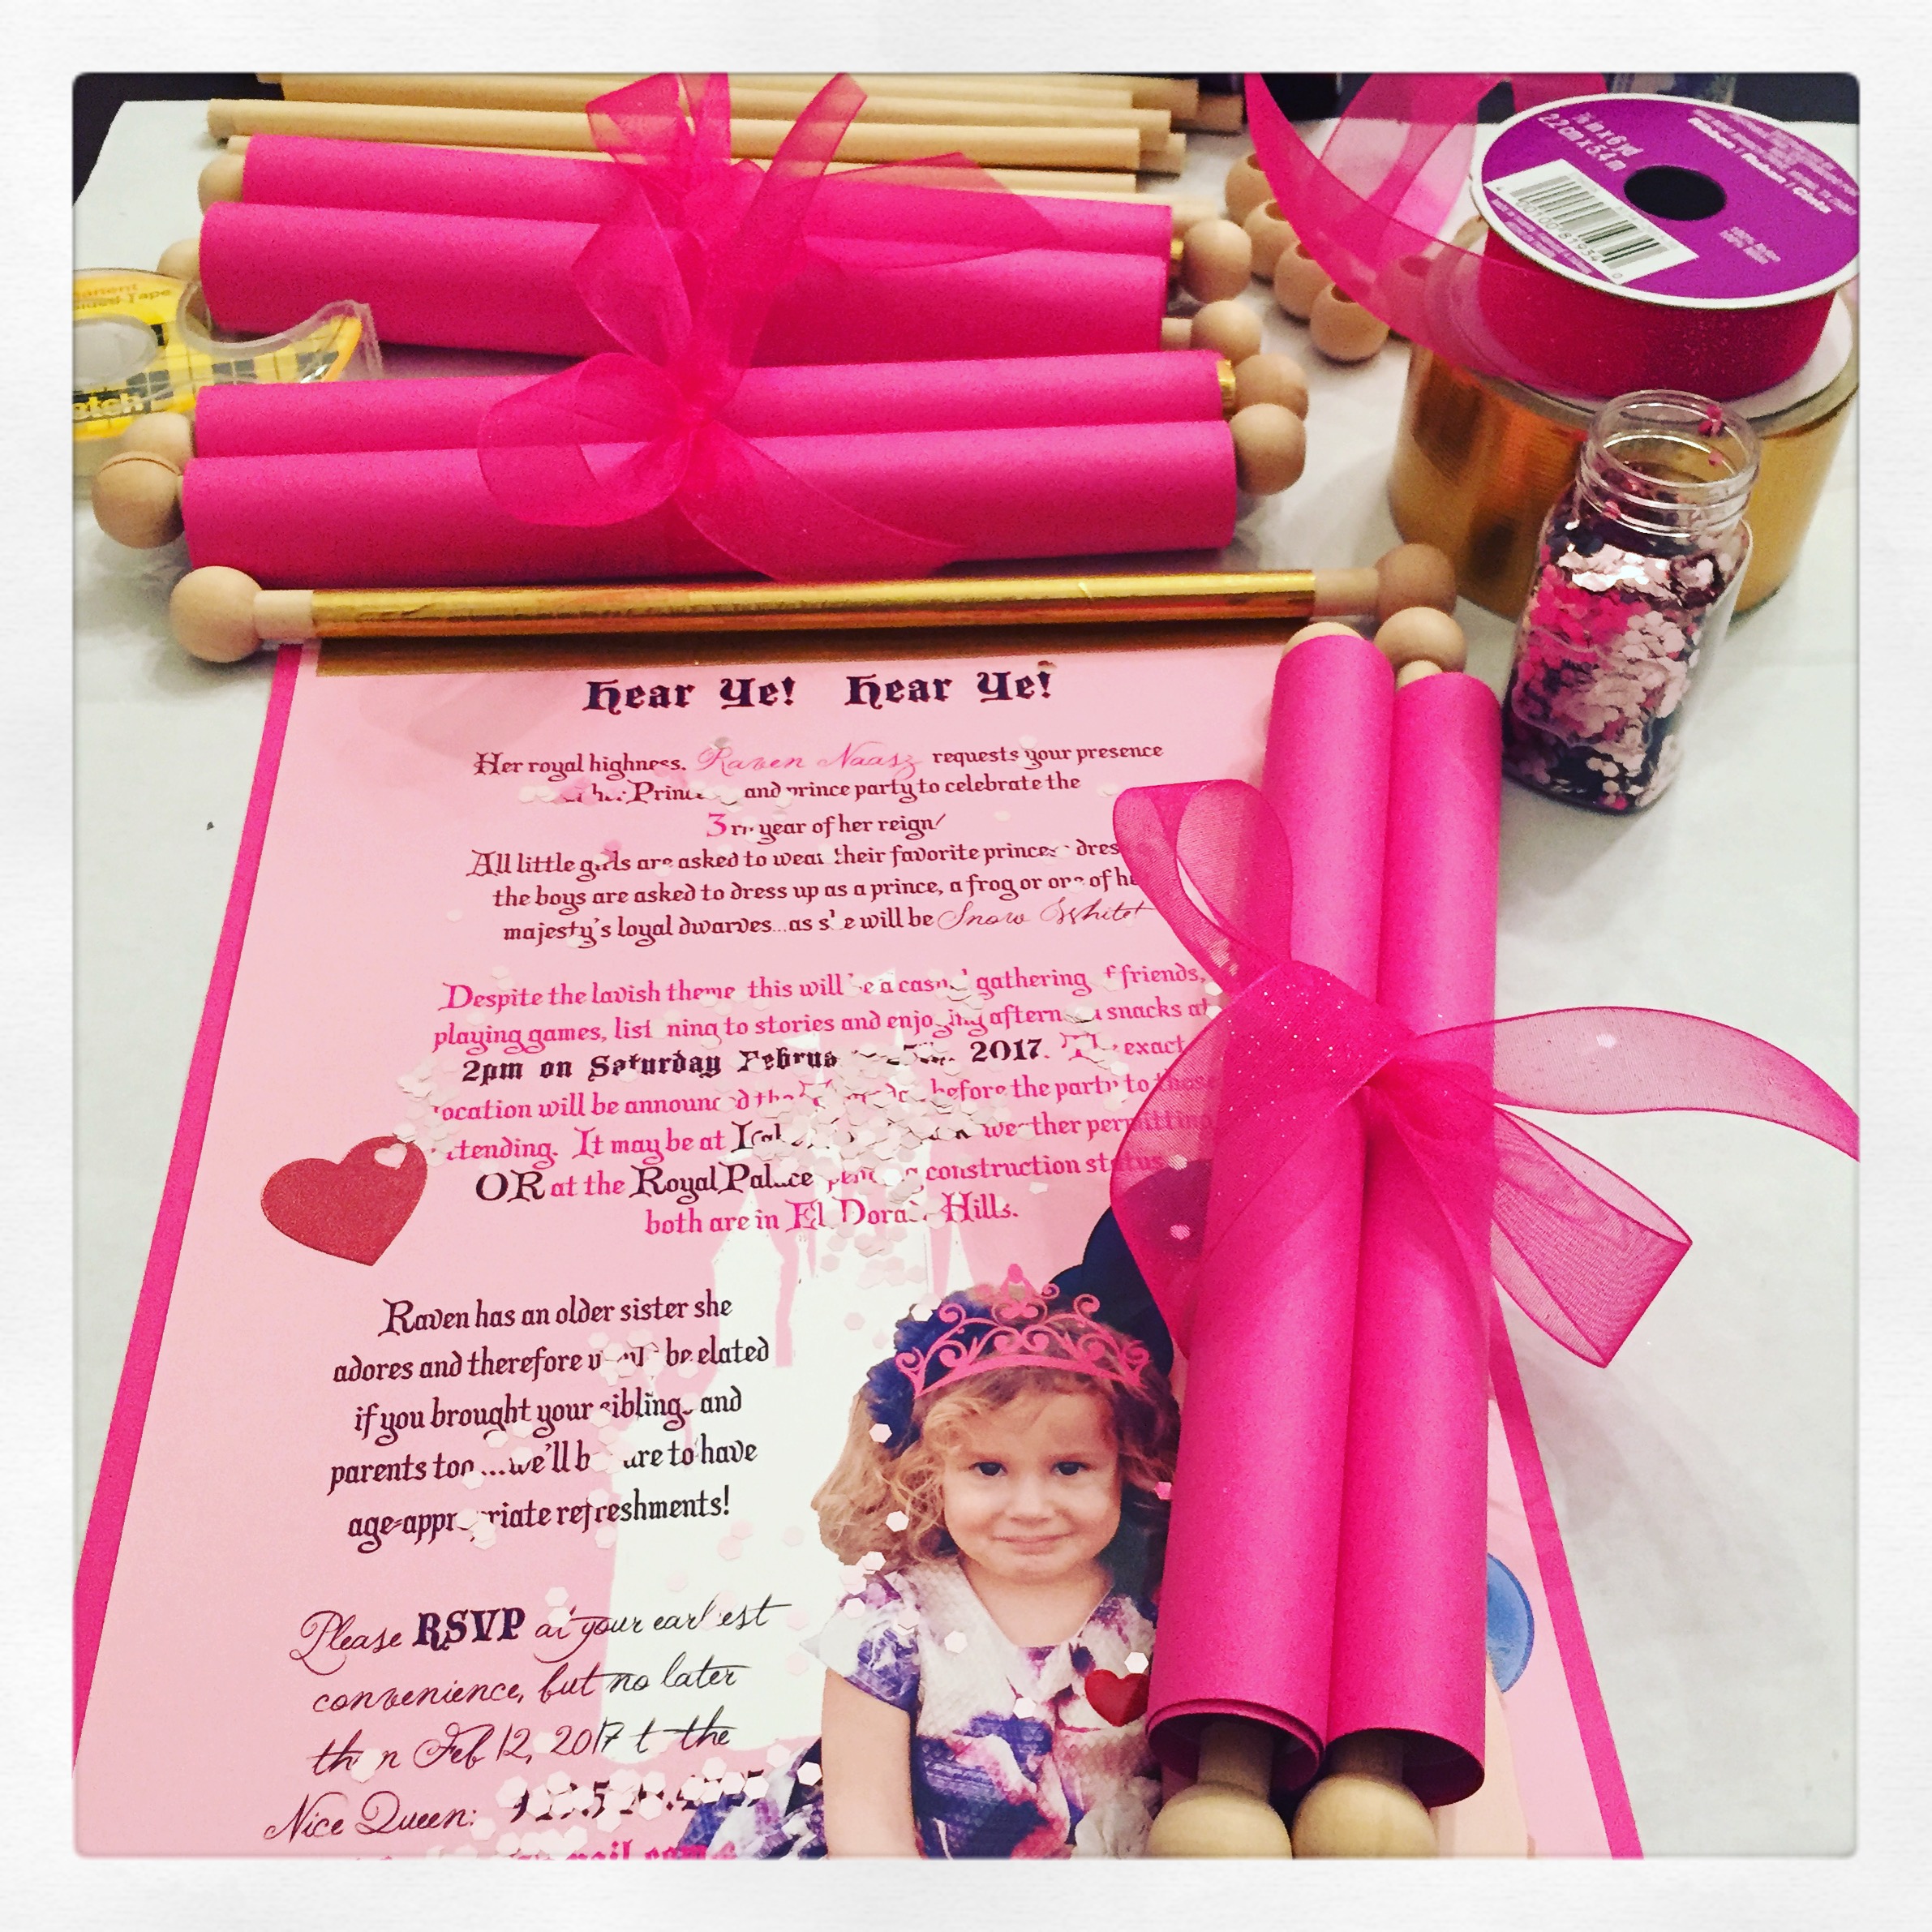
Child number two has had less exciting birthdays thus far, and recently working a lot less I figured this is the time to do it up. So this girl is getting a full on princess party for her third birthday complete with her own custom princess dress made by mom. So what better way to do her invitations then a royal scroll?

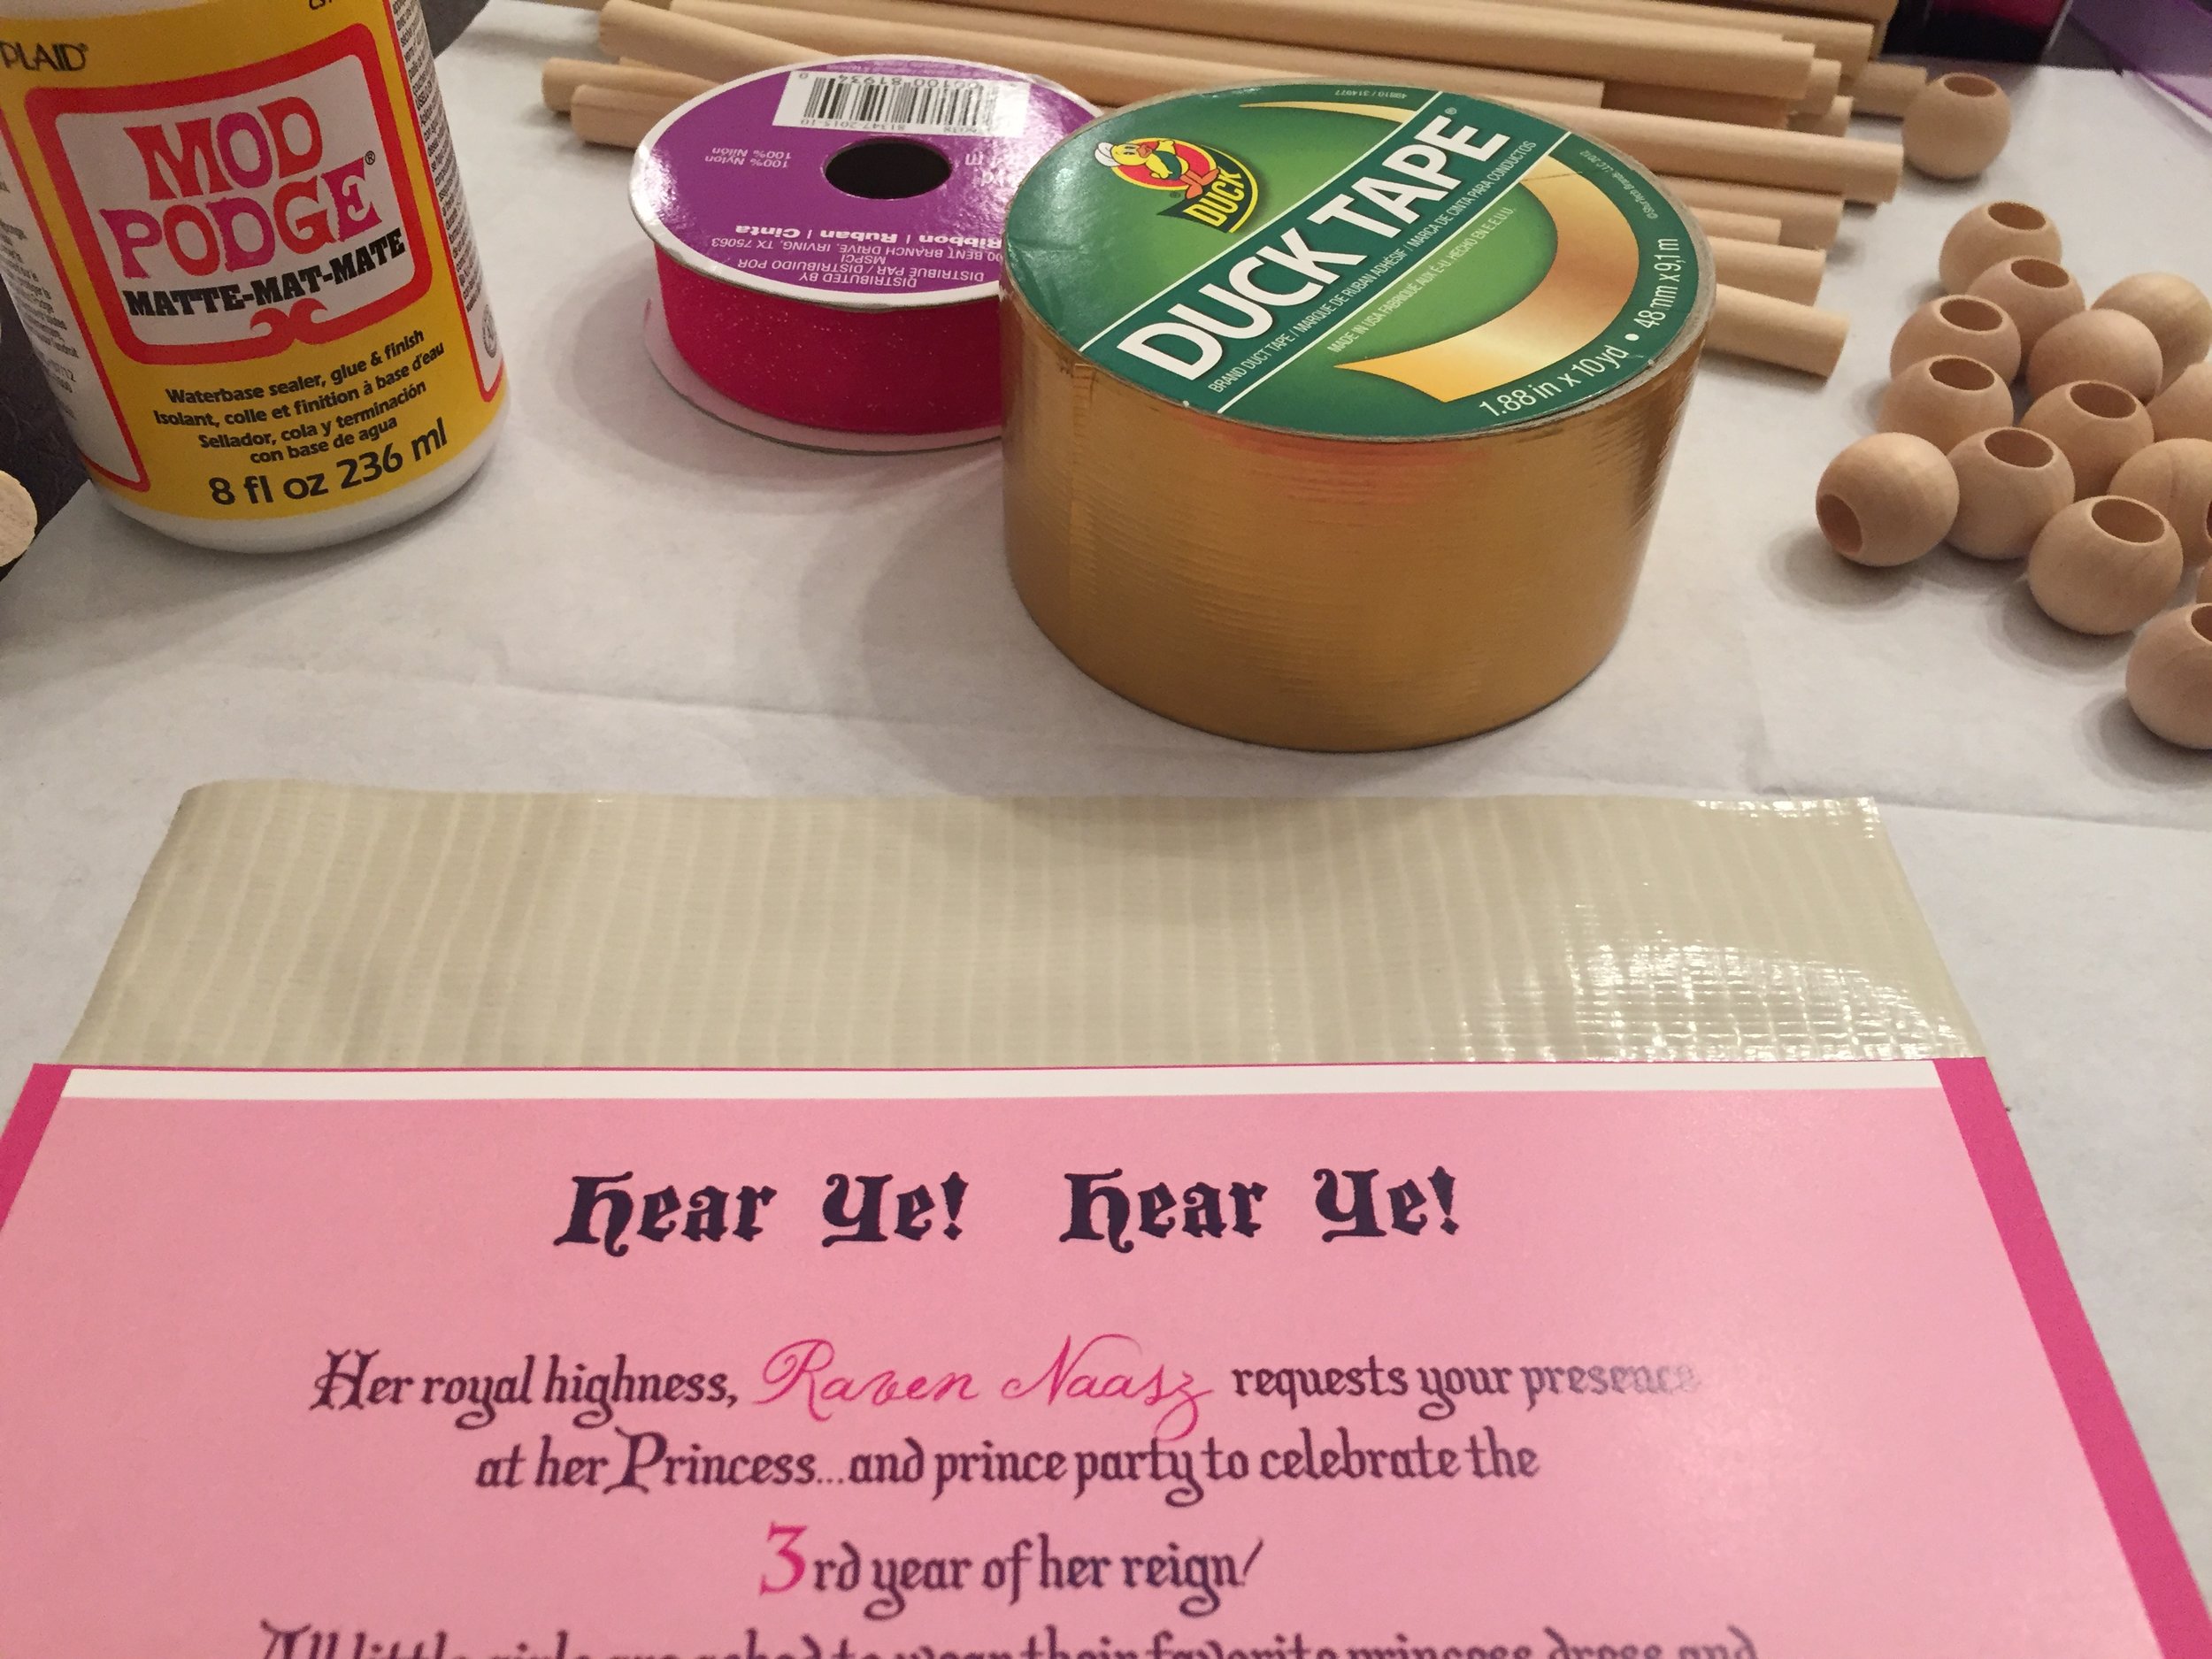
Supplies:
Dowell rods: I ordered online (you can also find at major craft stores) dowell rods (3/8" in diameter) and had the husband chop them into 4s, making each about 9" long. They cost about $1/each which is good for 2 scrolls so that's .50 per invite.
End caps: also ordered the wood end beads/caps w 3/8" holes. Need 4 per scroll, $1.
2" wide gold duct tape .50 each invite (used this to sandwich the paper invite and dowell rods all together.
Colorful card stock paper for backing .10 cents per invite
Self designed artwork in PSD, sent over to Fedex for printing and dye cut $1.50 each
Ribbon- need about 12" per invite $.50 or less
double sided tape for attaching ribbon
scissors
optional (I bought but didn't end up using): gold paint to paint the end caps, liquid adhesive to attach print to backing paper (I tried this but it bubbled when folded, so just sandwiched the two together at top and bottom and totally worked.
mailing tubes: $1 each; cost of mailing $3
Total cost per scroll: $4.10 (add $4 if mailing) , of course you end up with more than you need based on package quantities, so average about $5-6 each and if you set up an assembly line, each take about 2-3 mins.
Item list from Amazon:

Tips: You can download custom free fonts from dafont.com
i reaearched hear ye vs. here ye for a while and this is how they use it in legal docs.

Trick to getting a smooth and even roll is to start at the top and tape/roll all the way down, then tape the bottom rod in place as it seems to fit smoothest.
Kayla Dress
Loving the detail and specs in this 12 yo design sketch.


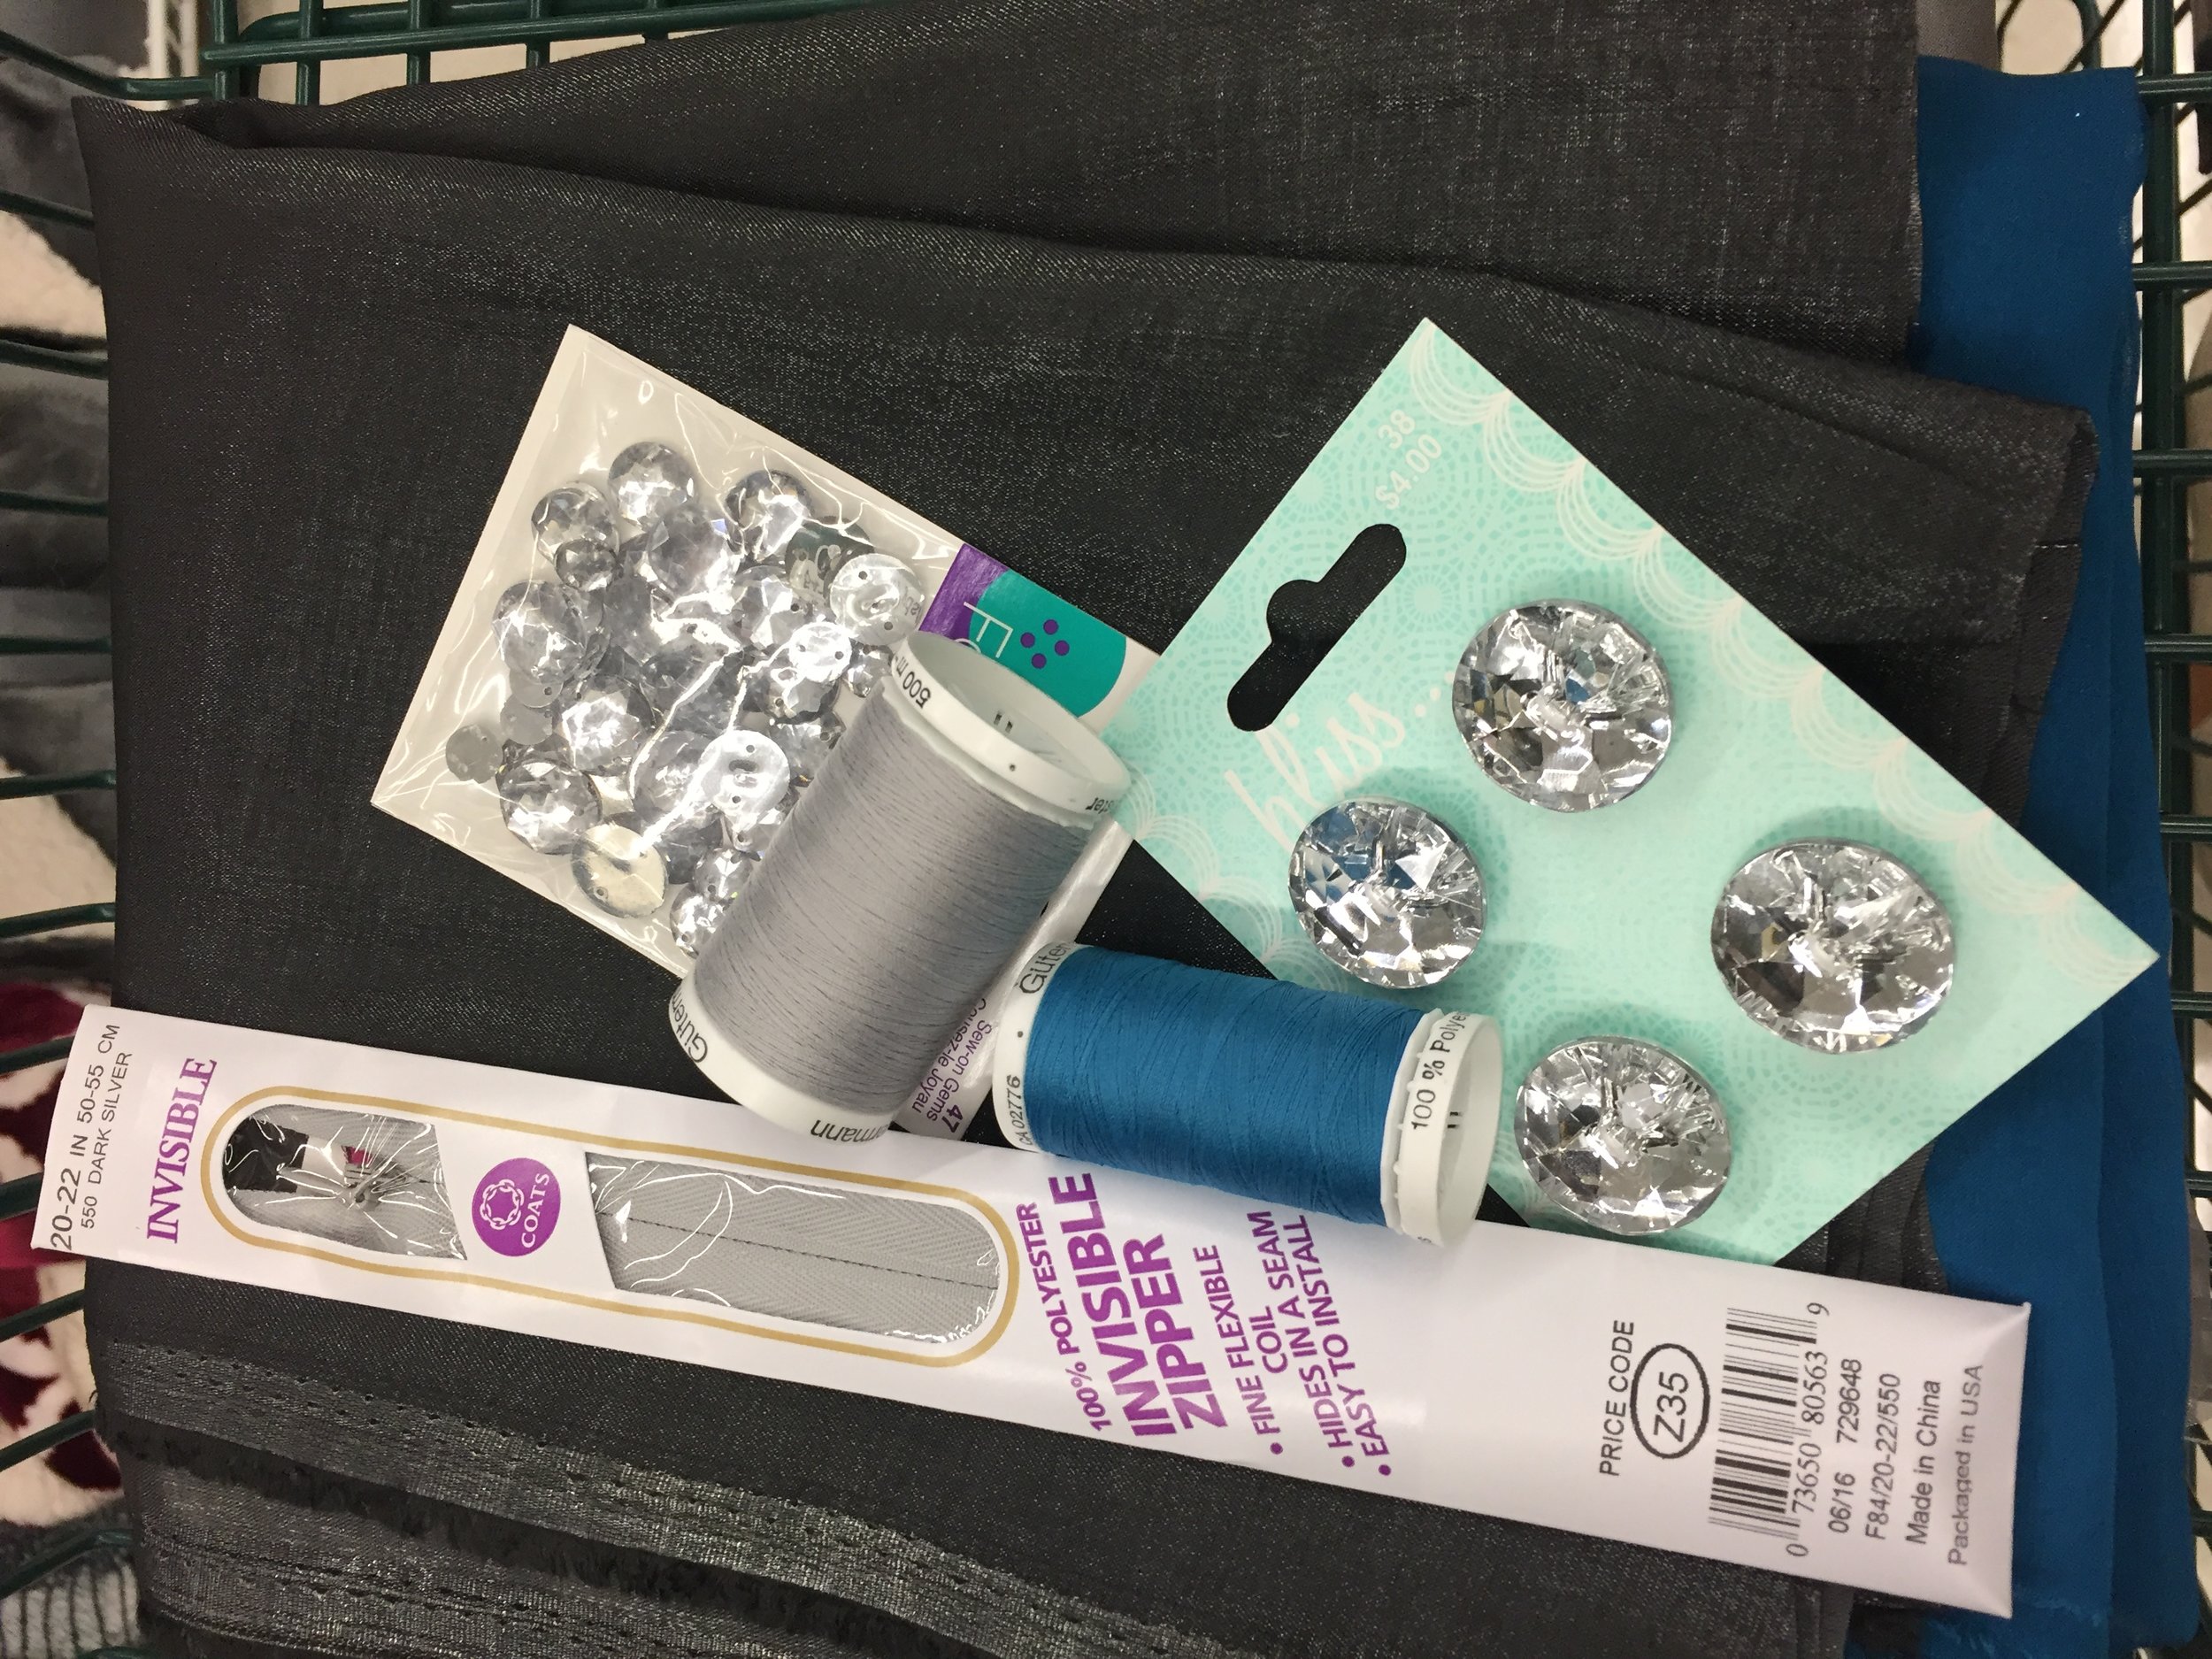
Raw materials...silver poly satin top, silver organza for sleeves, turquoise for skirt and rhinestones and darker silver for finishing trims 👗💚💙 this is going to be a fun one.
Raw material roundup
Better get patternmaking, pre washing and sewing so these little girls have their perfect dress for the fashion show!

Dress for Charlotte 💖

Avah's pretty in pink dress 💕

Prim and proper for Ava Gholi 💜

Fun mix for McKinley 💜💗

Bridal gown for Riley 👰🏼

Sweet and pretty for Layla

Bold and pretty blues for Mae 💚💙
Fashion camp fun
Making swim cover ups and creating mood boards

Teagan's Dress 💜
After learning about a favorite dress this little girl had, I decided to modify patterns and make her something similar in the new fun fabrics she picked.

The inspiration

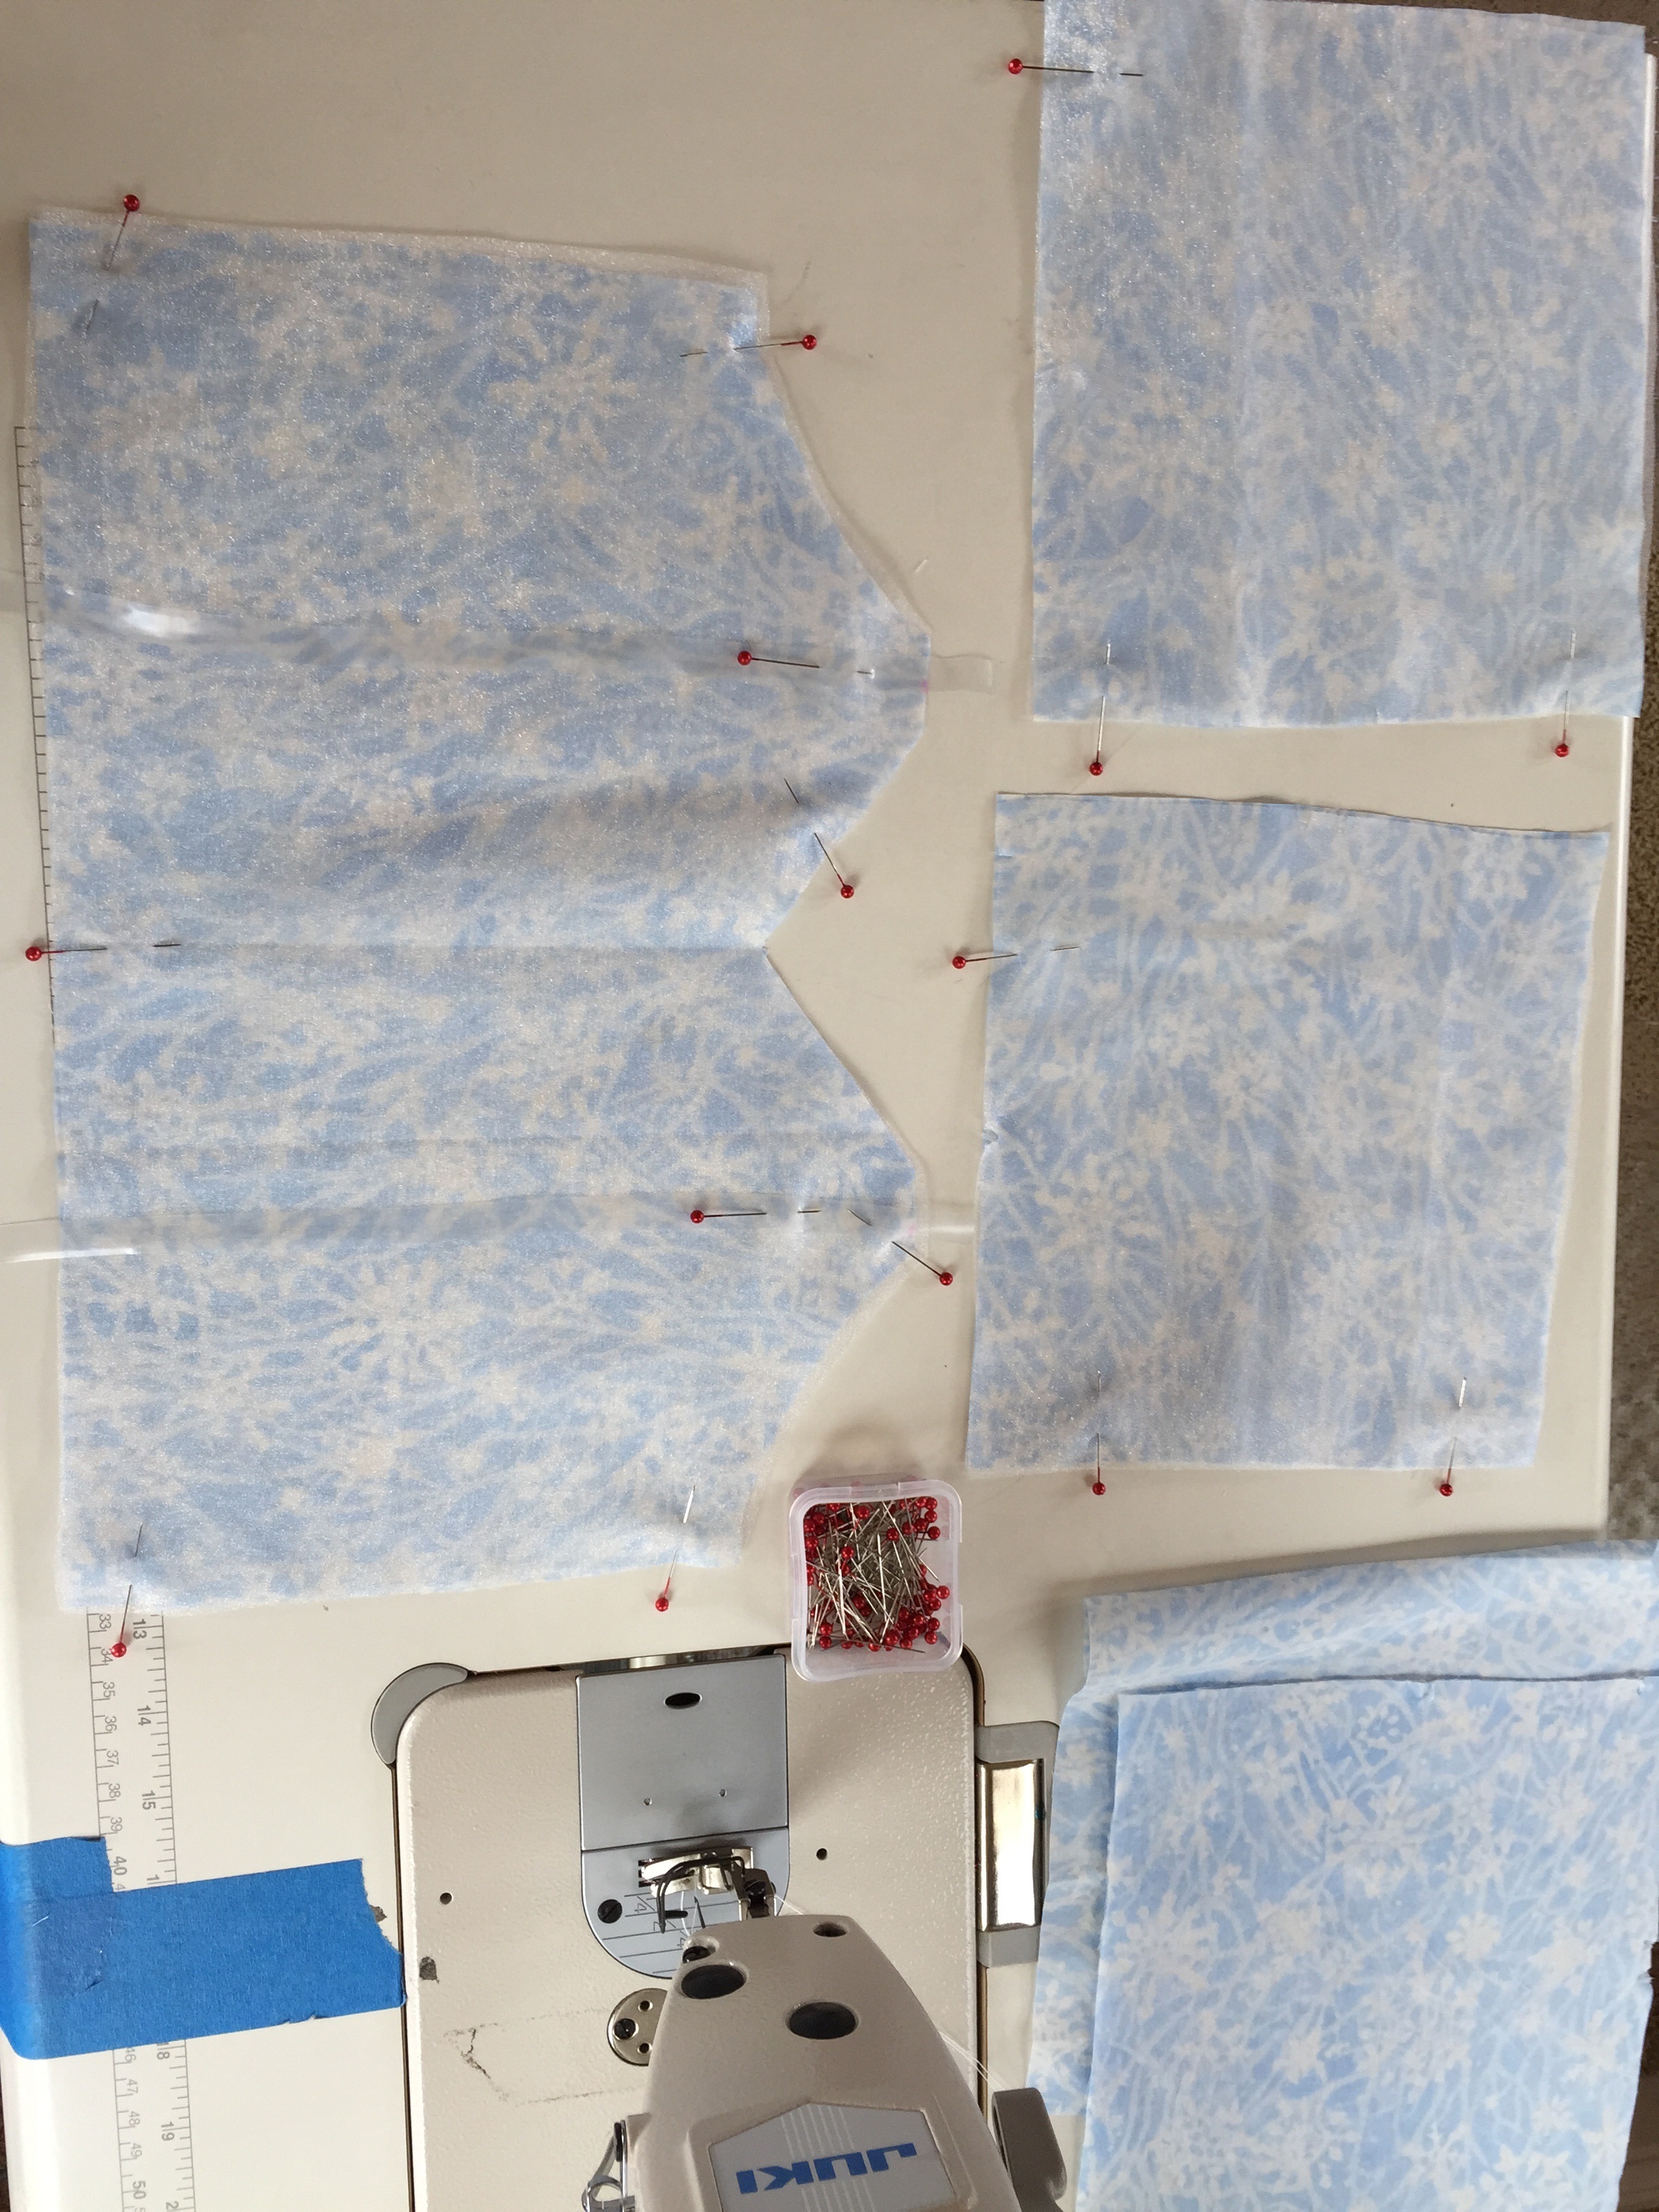
Patter making

Cutting

Bodice


Butterfly skirt
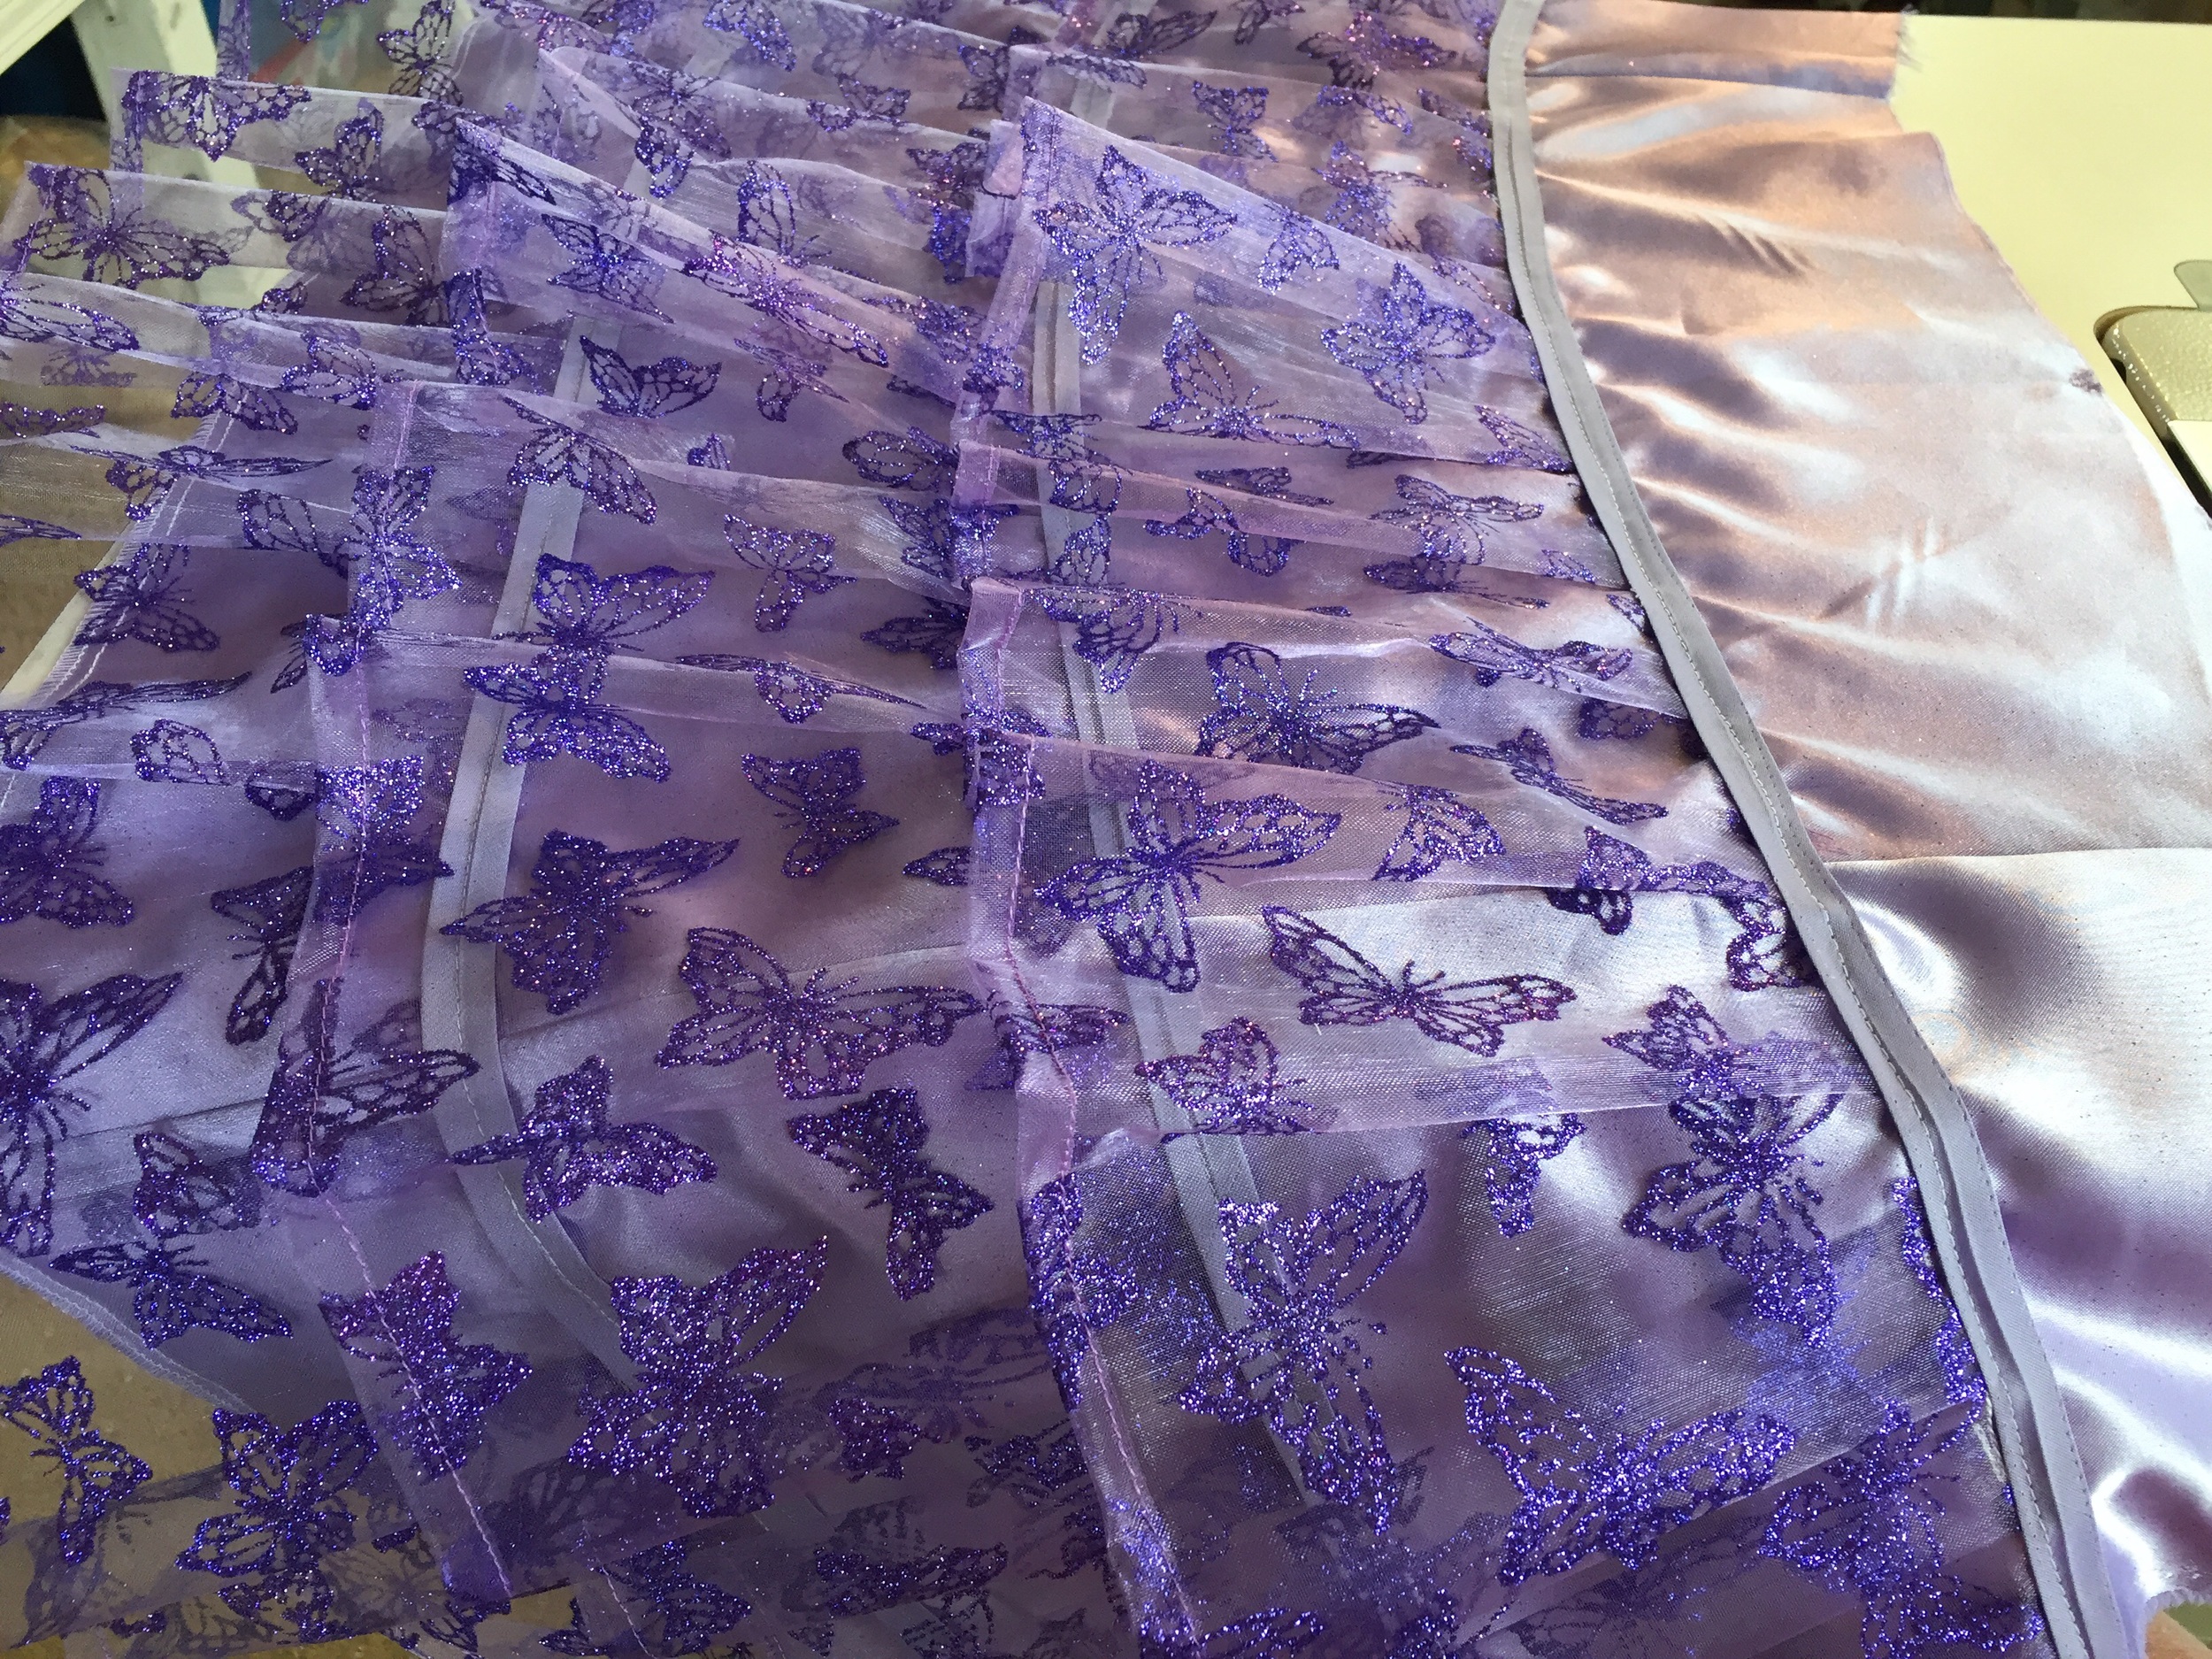
Tiered skirt overlay with bias tape trim

Finished dress for Teagan 💜
Zebra print for Finley

The star of the July Fashion show 💗 a beautiful and brave girl named Finley.
Sam's fabrics
Miss Samantha of Lamorinda insisted on sequence and pink for her fashion show dress 💗 raw materials

Feather design project
For fashion camp 💗💗

Fabric shopping
Fashion camp Rockstar Avah and her sister Zara picking out fabrics for a smoked summer dress.

Tissue dress fitting w the queen

Mother and daughter pj party
Avah's Dress 💙


Persian New Year dress for Zara 💗


Superhero shirts


Prepping for fashion camp

Kids Activity Exop
Fashion craft for the kids


